OWASP - Android UnCrackable Level-1 Walkthrough
Overview
| Item | Details |
|---|---|
| Platform | OWASP MAS |
| Machine | Uncrackable L1 |
| OS | Android |
| Pwn Date | 20 May 2024 |
This is a mobile reverse engineering challenge from OWASP MAS(Mobile Application Security) Crackmes. It’s a level 1 Android Uncrackable app. The aim of this challenge is to find a secret string hidden somewhere in the application.
(I have completed this challenge long back and I did the whole process again for writing this article. So the references and versions will be latest)
In this article I have included static and dynamic root detection bypass. Also in addition I have bypassed the secret string validation functionality also. All of those in a beginner friendly, detailed way. Feel free to explore.
Installation
First let's setup the environment for our challenge. I have used Android Studio emulator (Android version 14) here. You can use any emulator you want (e.g Genymotion, Memu, etc.). The application is compatible with Android version 4.4 and above.
David Bombal have shared a good content on setting up an android studio emulator. You can refer it.
https://youtu.be/pcwRWBHFAlg?si=d_BRf9aEMpOUqgTZ
Connect ADB (Android Debug Bridge) with your emulated device. And check if it is accessible through ADB.
adb devices

Now we have to install our application into the emulator. You can get the APK file from the offical OWASP MAS website.
You can either install it by drag and drop or you can use adb command to install it into your device.
adb install UnCrackable-Level1.apk

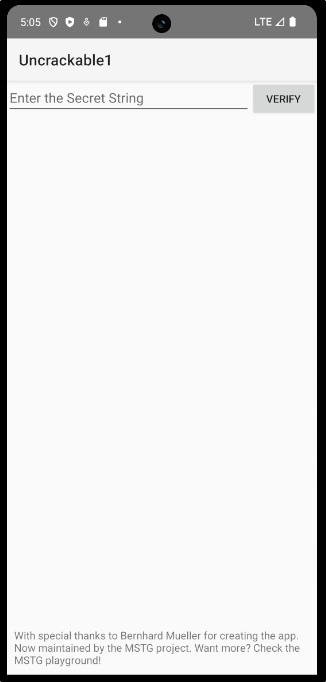
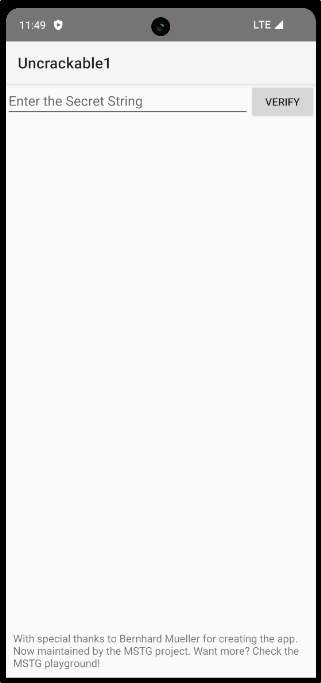
Now lets open the app and explore how it is implemented.
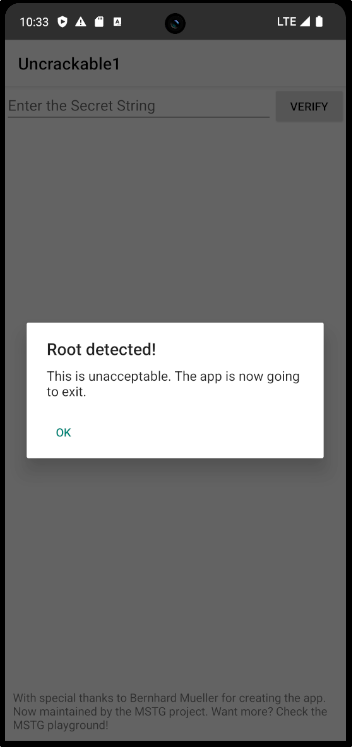
The application is detecting that we are running the it on a rooted device. When you click "ok" the application will be closed. So now we have to bypass root detection.
Root Detection Bypass - Dynamic Analysis
Here we'll be bypassing the root detection mechanism by using the tool Frida.
Reference:
Frida on Attacker Machine
Frida on Android
Now lets confirm our frida server is running fine in the emulator.
frida-ps -Uia
- U → It connects to a device connected via USB.
- i → List installed applications, not just currently running processes.
- a → Application information
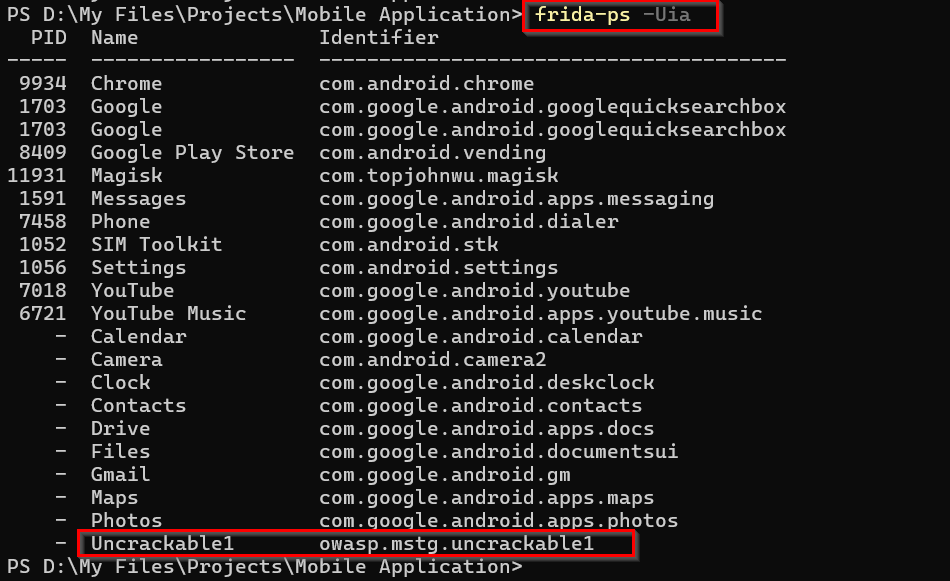
Now we know our frida is working fine. Next we need frida scripts, which can be used for root detection bypass.
Reference:
Use Frida CodeShare for scripts - https://codeshare.frida.re/browse
I have used bypass script from Q0120S. Due to some network issues I copied this code into a js file and used it.
frida -U -f owasp.mstg.uncrackable1 -l .\RootDetectionBypass-Q0120S.js
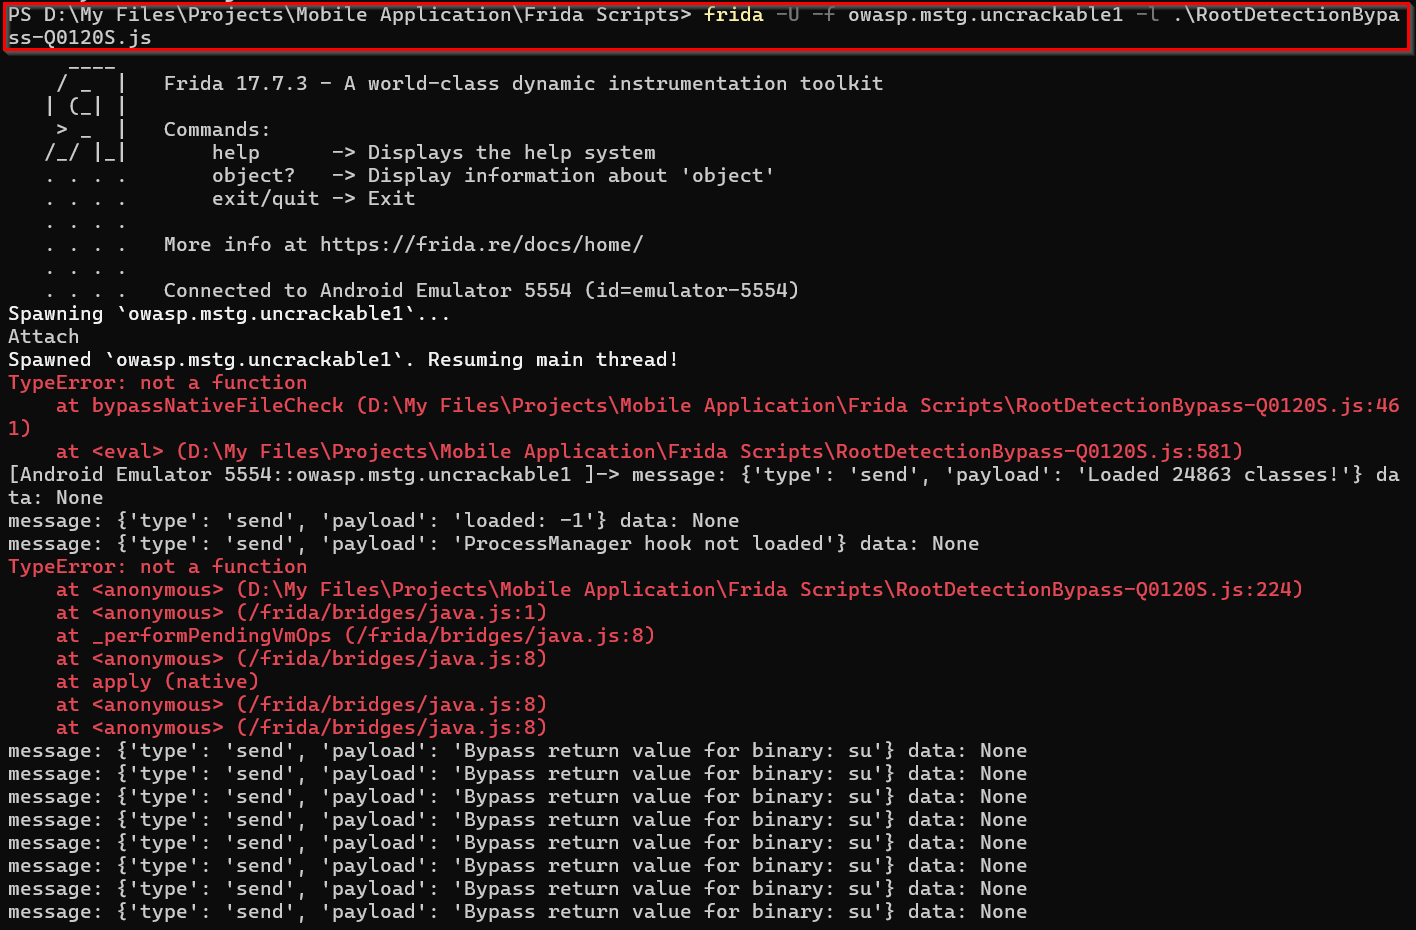
Here we were able to successfully run the frida script and bypassed the root detection.
Root Detection Bypass - Static Analysis
For the first method we'll have to always run the bypass script to use the application. Now we'll try the manual root detection bypass method by code analysis. Here we are going to permanently bypass the root detection mechanism.
First we need to decompile the APK file to see how the application is implemented. You can use the apktool for that.
apktool d <filename.apk>
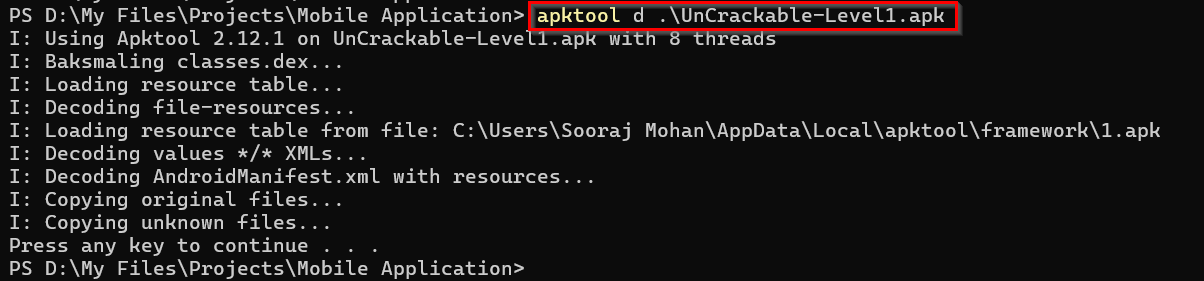
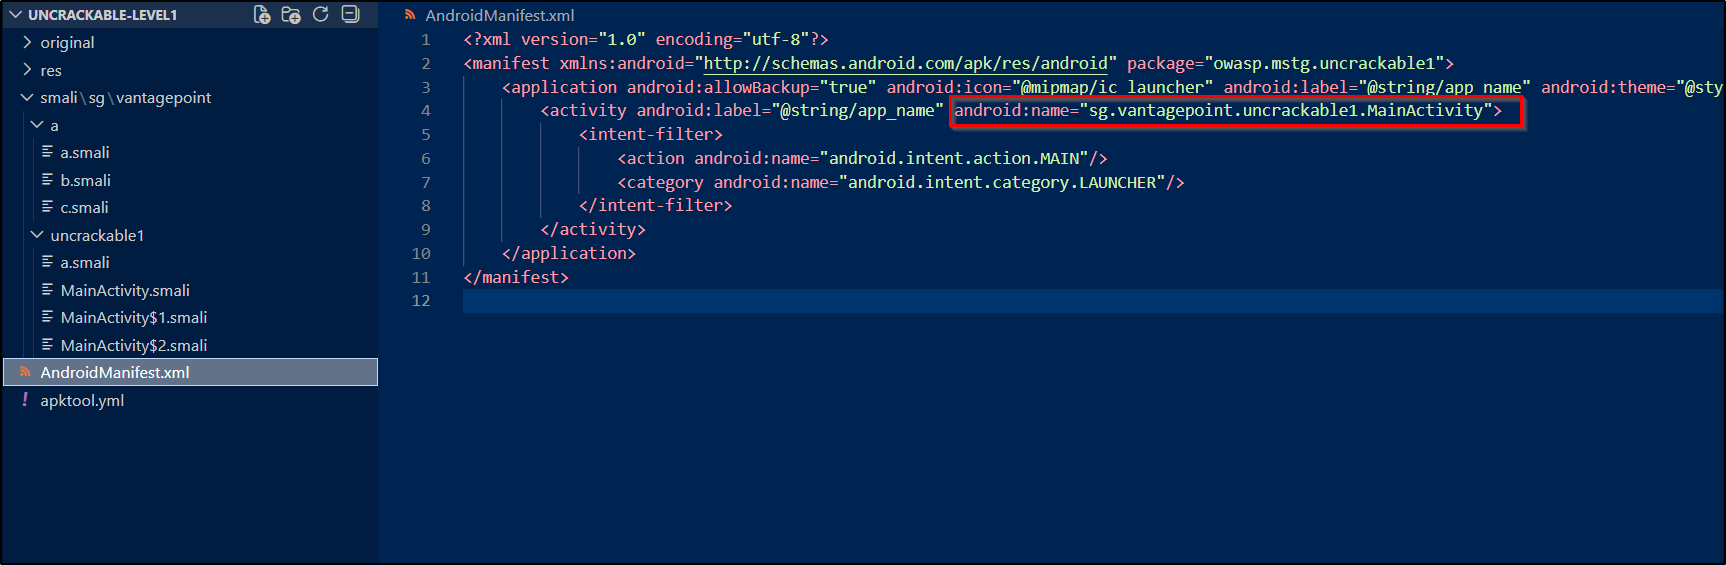
After decompiling if we open the folder in VSCode or any other IDE you can see the smali code of the application.
Smali is human-readable, assembly level representation of the Android's DEX(Dalvik Executable) bytecode.
I know it is bit hard to understand the smali code. You can use jadx-gui for better understanding of the code. After understanding the flow you can use VSCode for editing it.
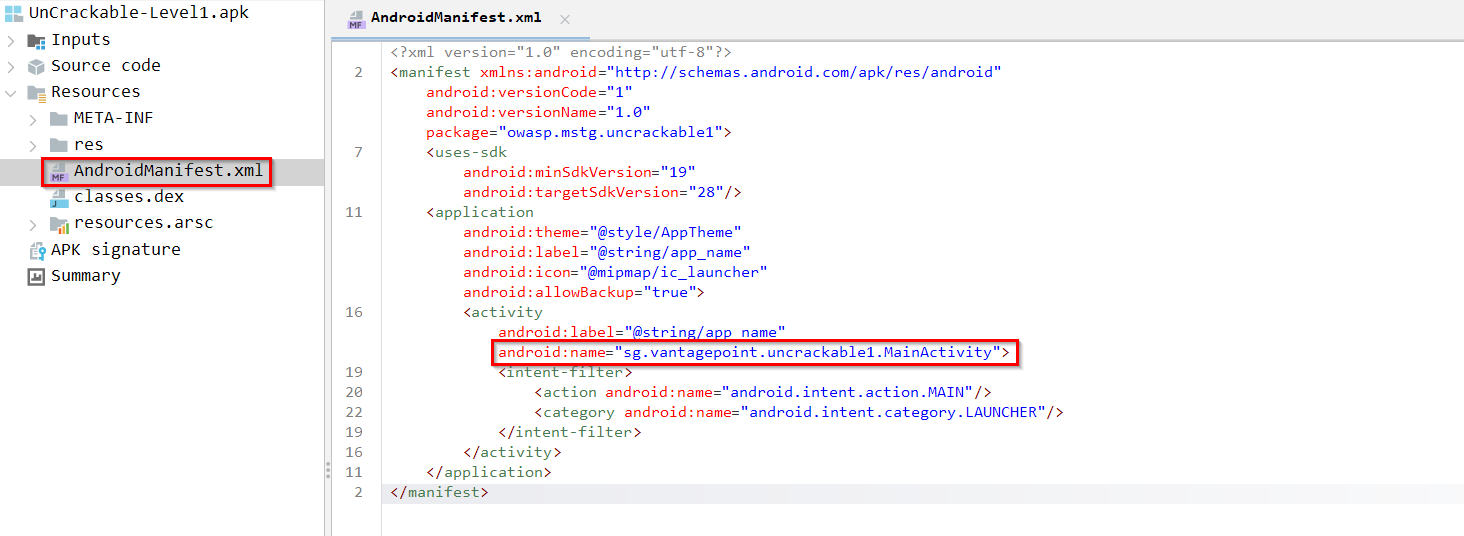
When opening an app first we have to check AndroidManifest.xml file. From there we can understand how the application flow - From where it is gonna start execution.
If you check the MainActivity file you can see the section where root detection is done.
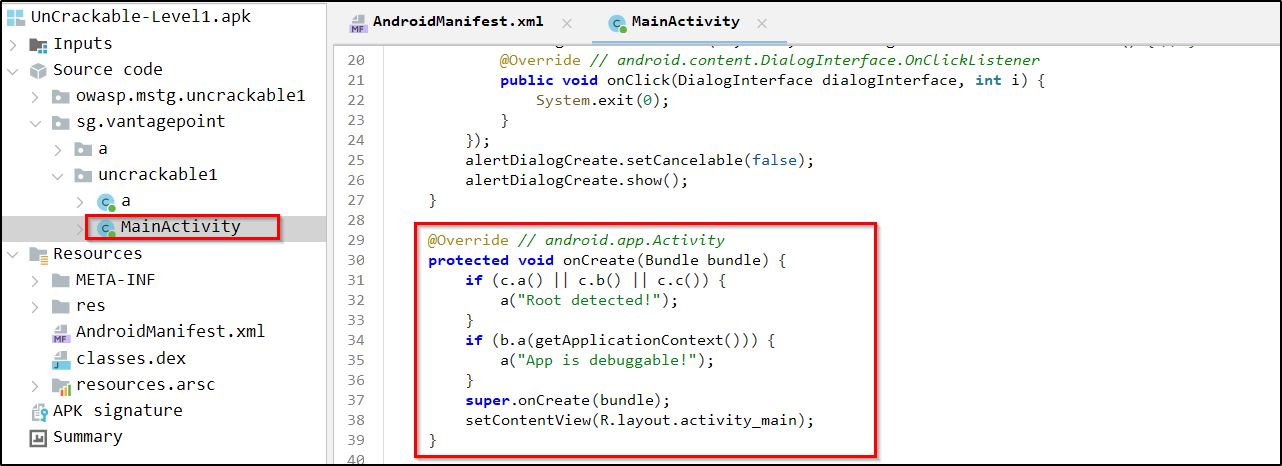
Check the methods that handle the rooted device checking.
Reference:
https://medium.com/@deekshithmoolyakavoor/root-detection-in-android-device-9144b7c2ae07
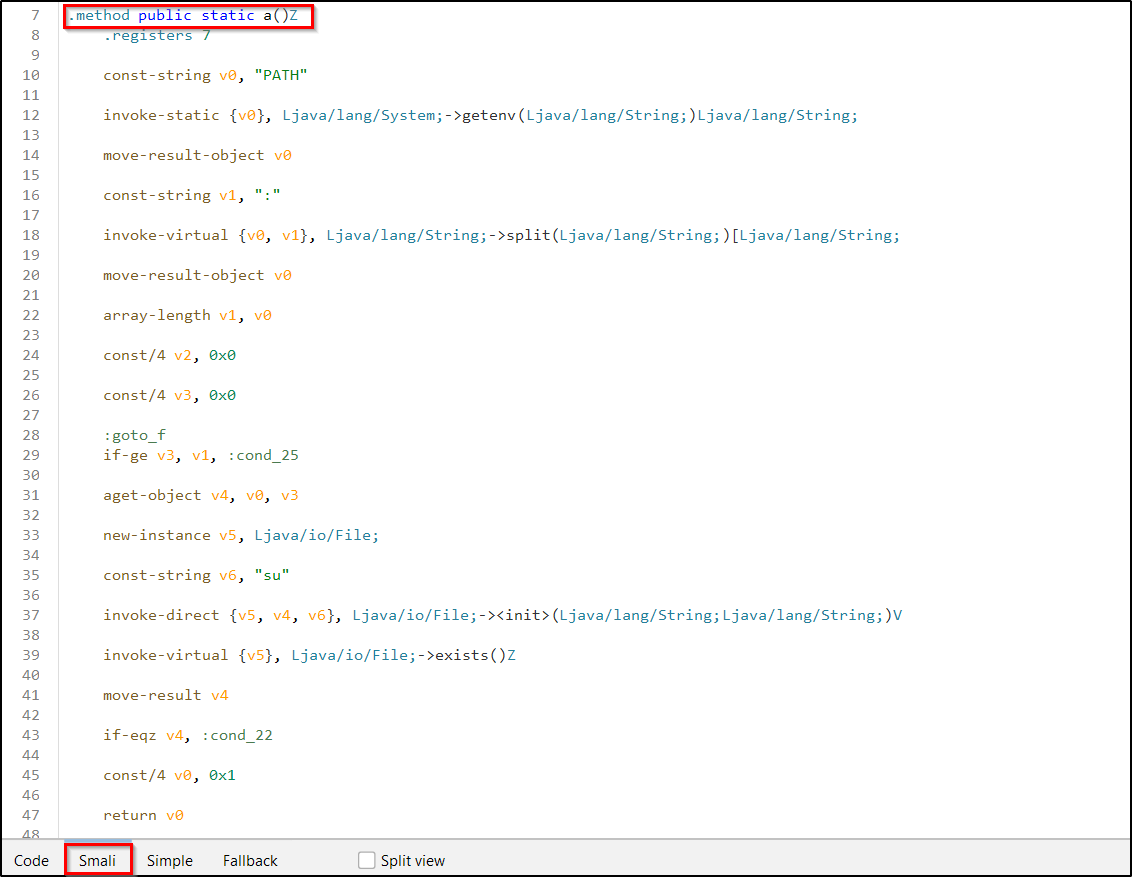
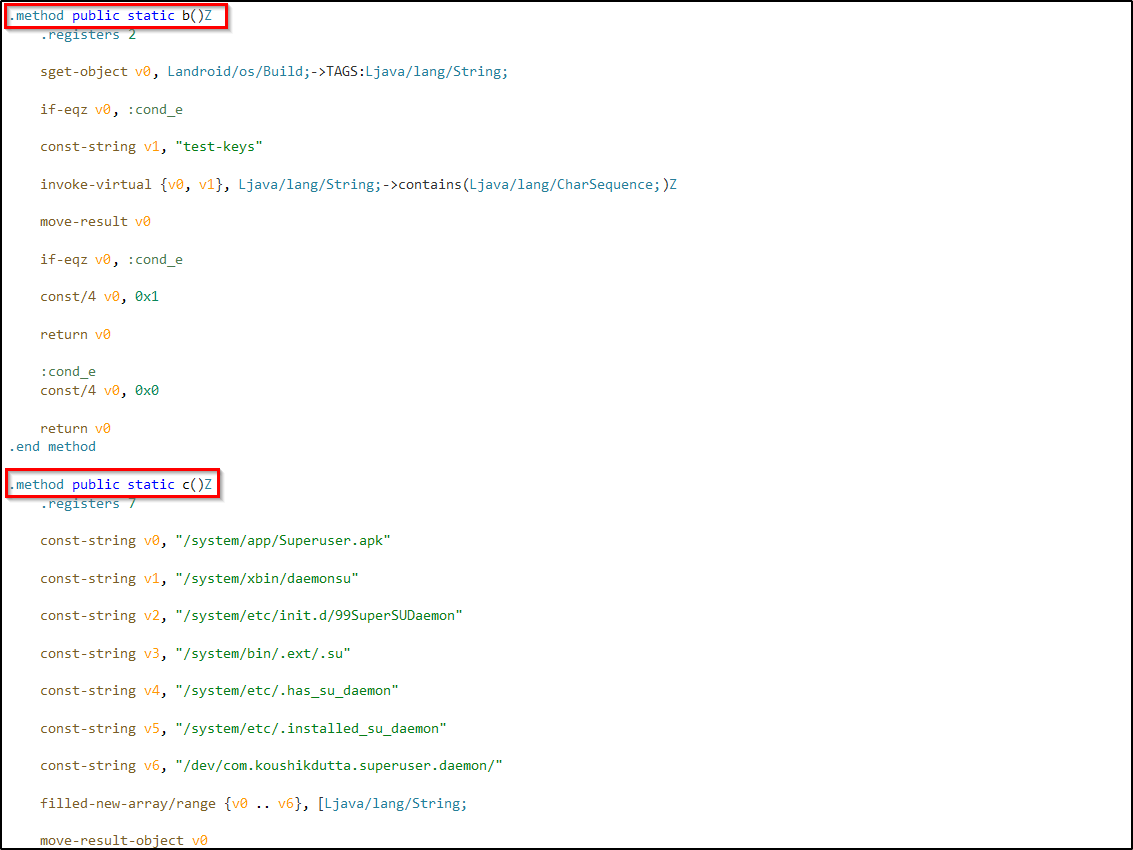
In the bottom of Jadx-gui we can see the smali option in which we can view the same code in smali format. This will help you to understand the same logic in smali code and also will be helpful for finding the code section in code editor.
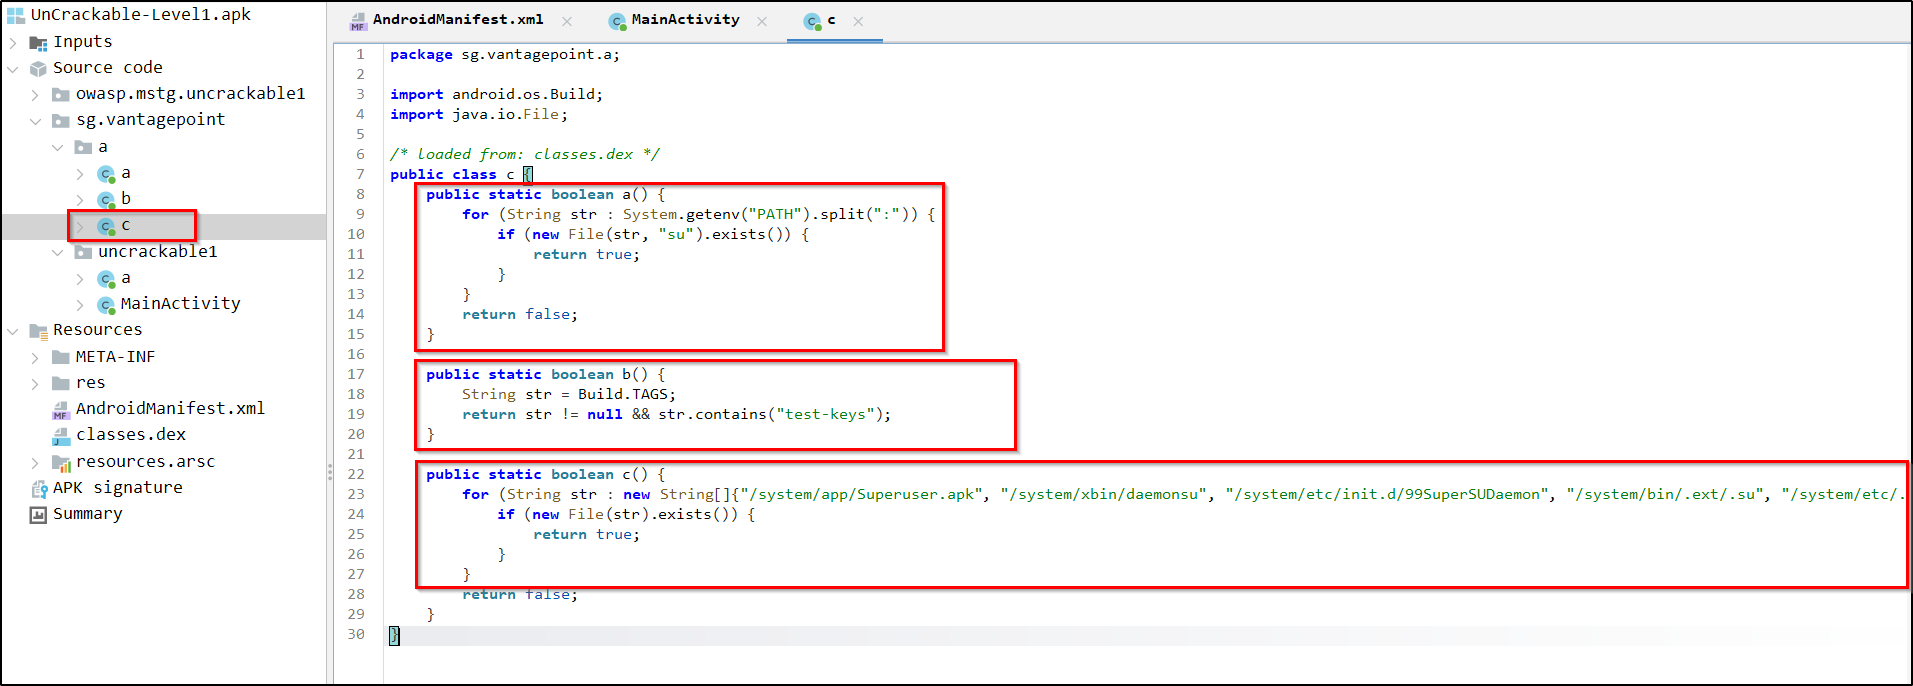
So based on the code we want c.a(), c.b() and c.c() to be false. If one of them returns true it will trigger the root detected message.
Now lets use VSCode or any other code editor to alter the code or remove the entire section. Then we will be able to bypass the root detection mechanism.
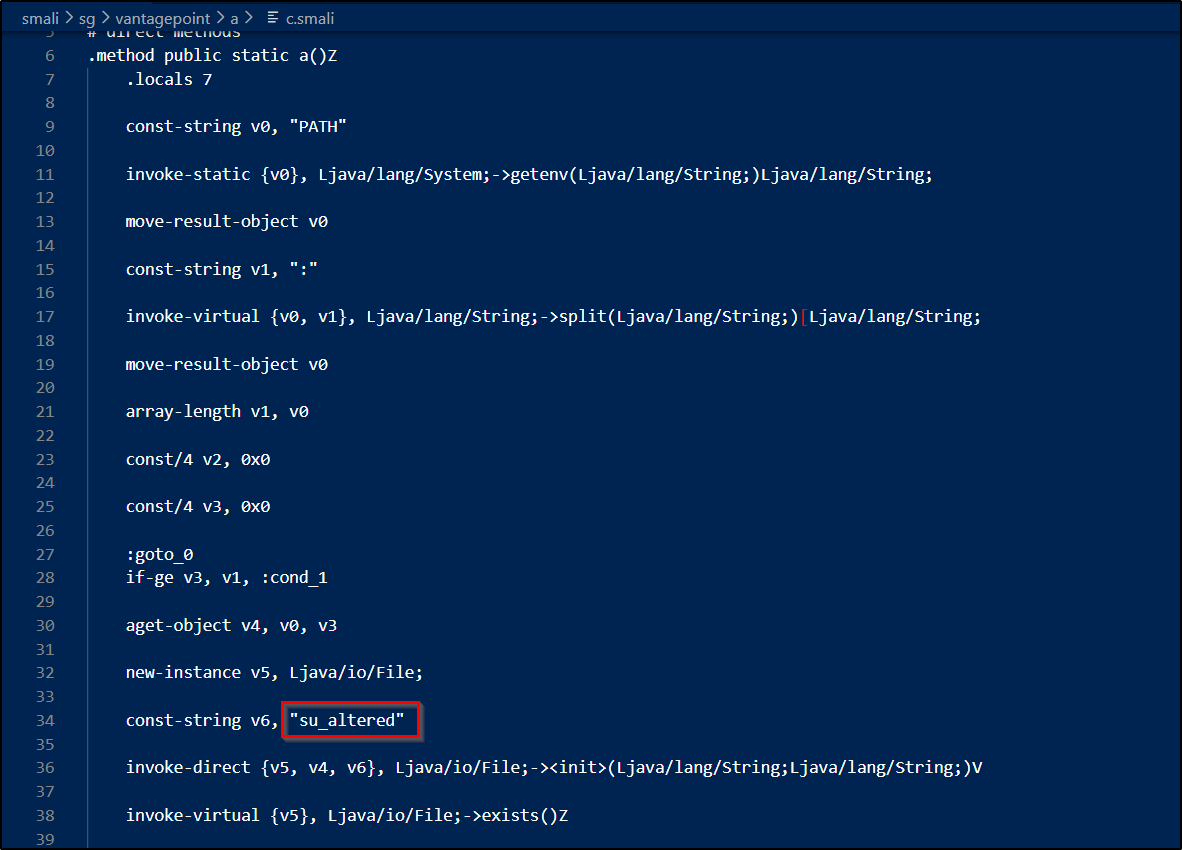
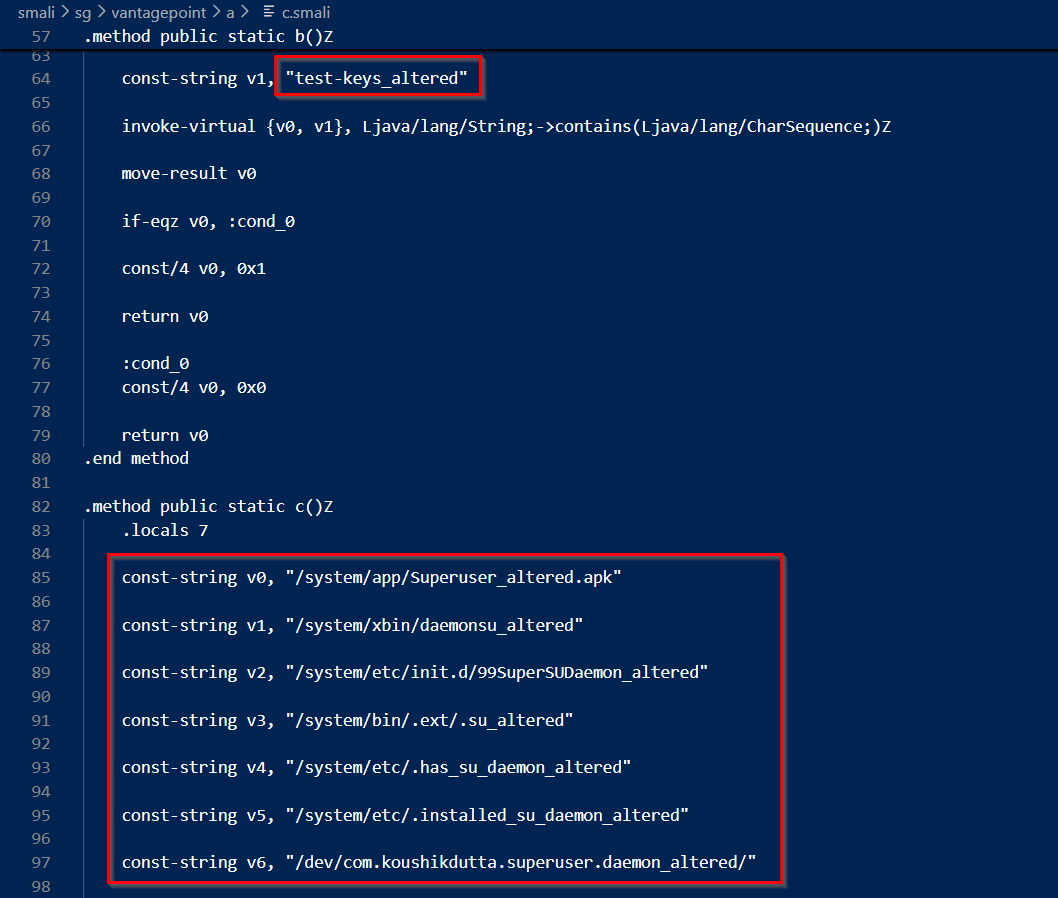
Instead of removing the code I manipulated it. Added "altered" to the keywords used for detecting rooted device.
Now save the smali file and build the modified apk.

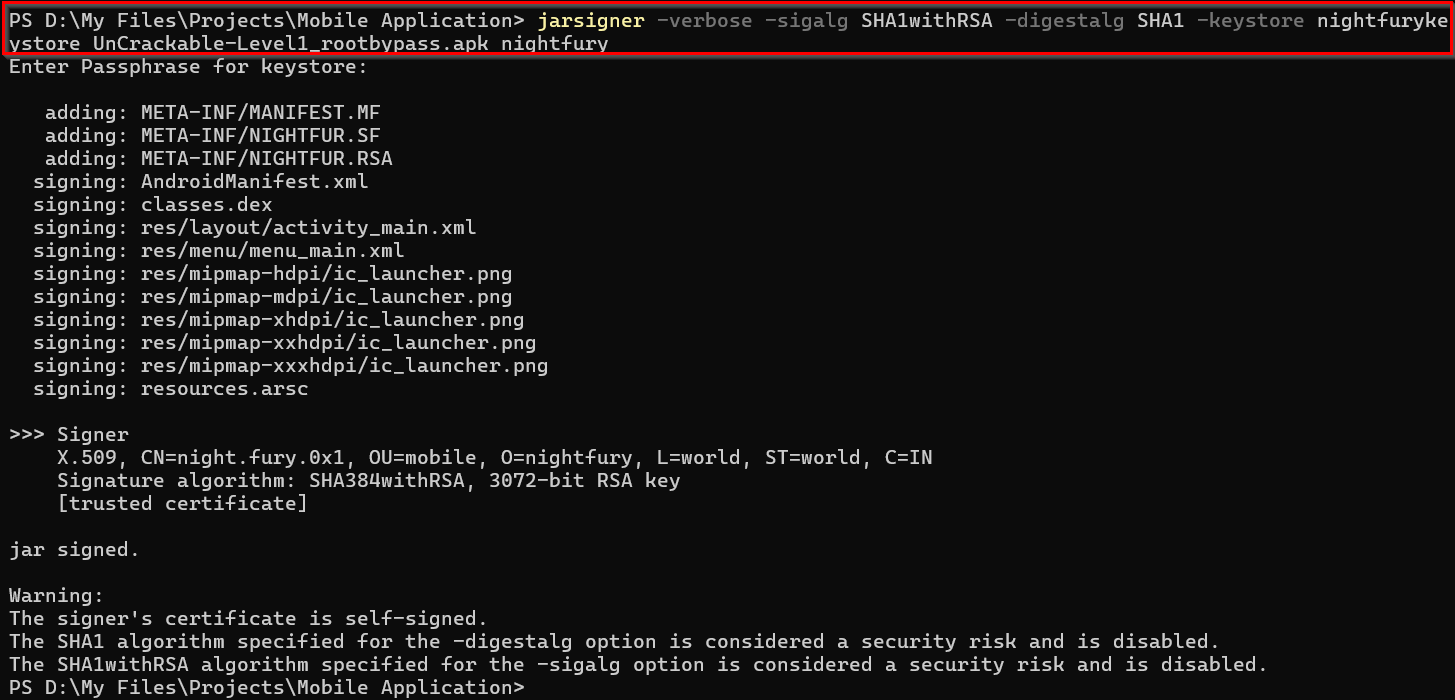
Next step is sigining the APK. We can't install an APK without signing it. You can use jarsigner commandline tool for that or you can use android studio UI for that. Here I have used keytool for generating the keystore (For first time only) and jarsigner for signing the apk file.
keytool -keystore <keystorename> -genkey -alias <aliasname> -keyalg RSA -validity 10000
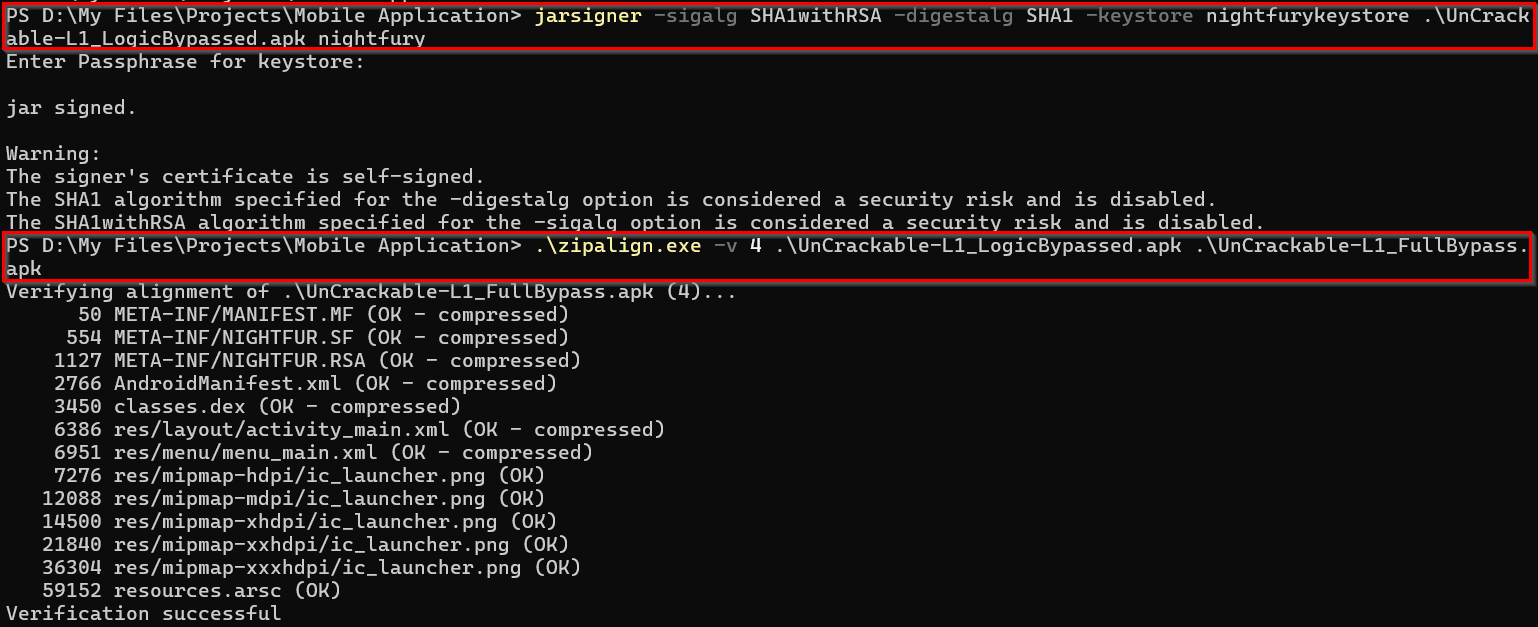
jarsigner -verbose -sigalg SHA1withRSA -digestalg SHA1 -keystore <keystorename> UnCrackable-Level1_rootbypass.apk <aliasname>
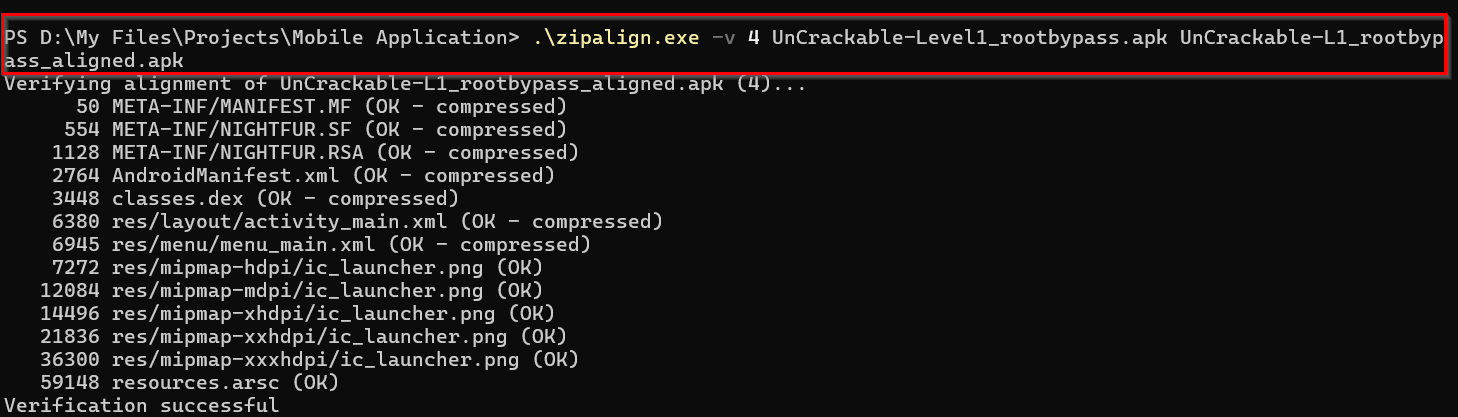
Now we'll be able to install it in the mobile device. But before that optimizing the application using zipalign is a best practice. This tool ensures that the APK is properly aligned.
zipalign -v 4 UnCrackable-Level1_rootbypass.apk UnCrackable-L1_rootbypass_aligned.apk
Before using the new application we have to uninstall the already application from the device. We can do it through adb.
adb uninstall owasp.mstg.uncrackable1
frida-ps -Uia to find the package name.
Now install and open the application in the emulator.

Here we successfully installed the application without root detection.
Finding The Secret String
Now to the main aim of this challenge. Finding the secret flag hidden within the application!
If you check the working of this application you can understand it. When we enter any string it is throwing an error.
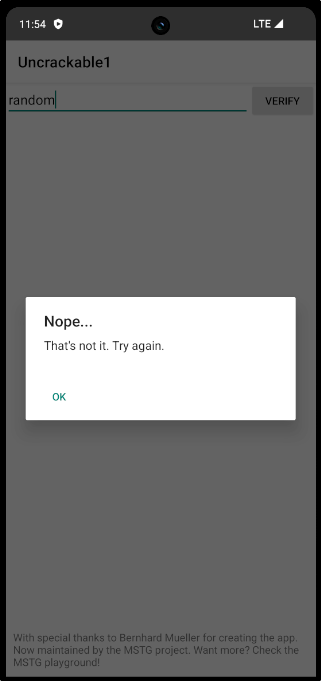
So our challenge is to find the actual secret string. For that we can go back to the source code analysis method.
From these sections you can understand the core working of this application. You can follow it like this:
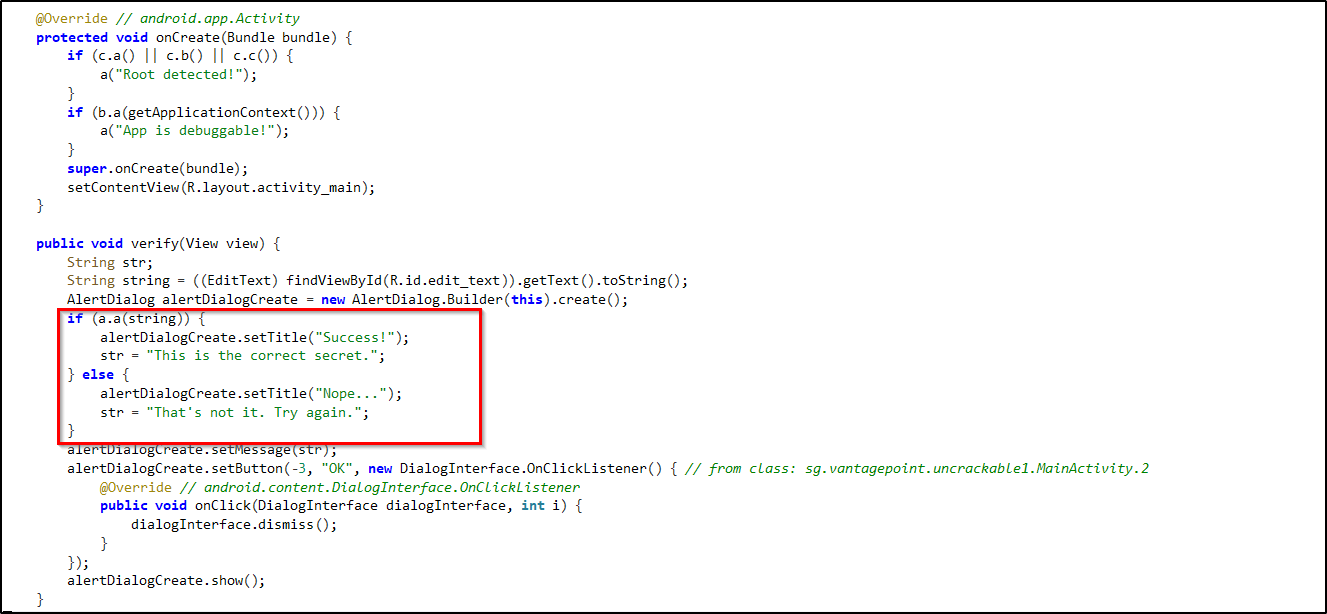
- First we checked the MainActivity file to find the section which throws the pop-up, when a string is submitted.
- From that we can understand that, we are getting the pop-up based on the response from the class 'a'.
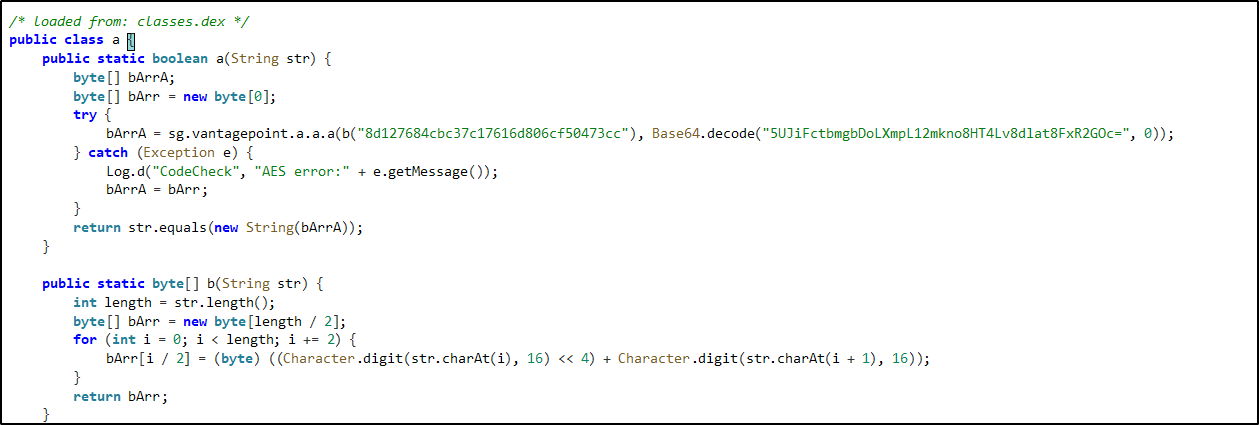
- There you can find many details if you go through the code.
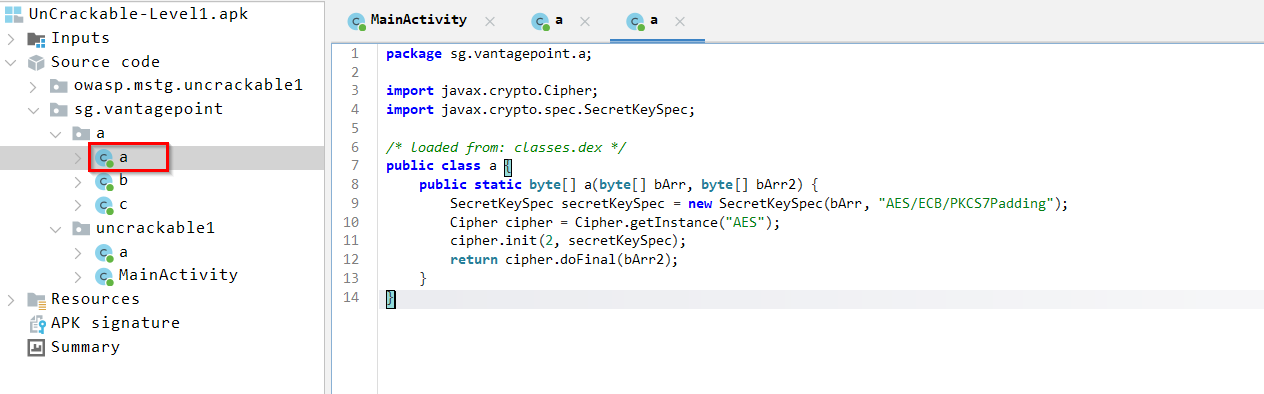
- So if you go to class "a" from sg.vantagepoint.a we can see that it is using AES algorithm with ECB mode.
- We can identify the same from the class "a" of sg.vantagepoint.uncrackable1 - "AES error".
Now the important part, we can see that the application using the key against a Base64 encoded string. So that must be the secret string we are looking for. Now we can use Cyberchef for finding it.

We were able to find the secret string because the encrypted string and the decryption key were hardcoded into the source code. Now lets try what we got in the application to confirm.
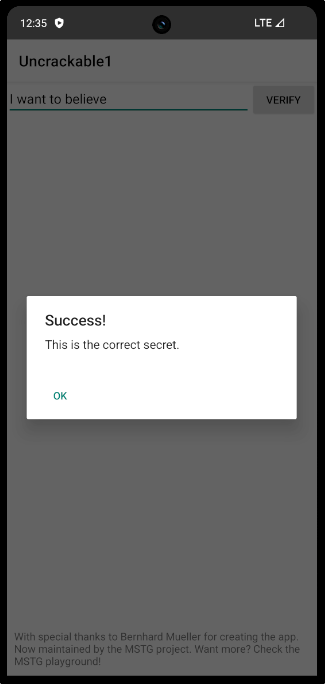
The secret string is I want to believe.
We've successfully completed the challenge.
Modifying the Secret String Checking Code
Now lets go to the additional part, in which I'm going to alter the application's functionality to accept any random string as the hidden secret string.
If you check the source code you can see, the string we entered is compared with the secret key and return true or false. Based on that we are getting the success or failure message.

Now this is the part we have to alter. So let's check the code in smali.
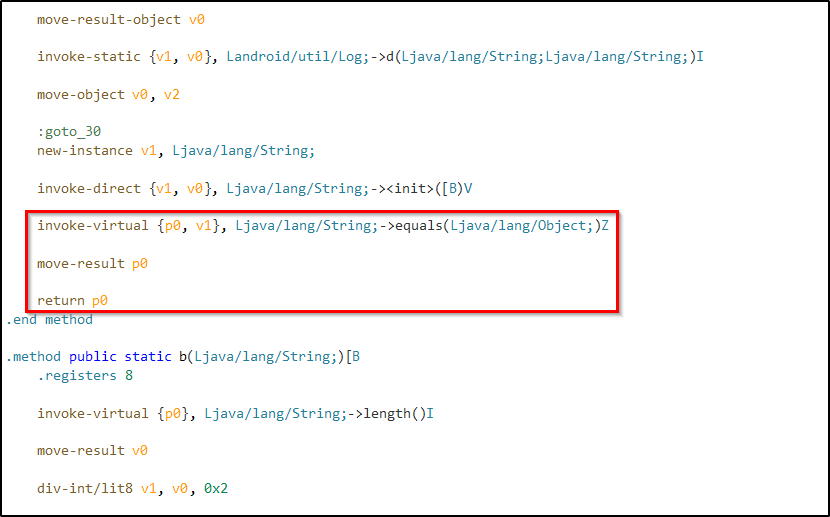
The logic here is simple. If the function return true we'll get success response. And what we need to make sure, we always gets a true value returned. For that we can return a constant value 0x1(true).
Note:
Make sure you are editing the smali of the root detection bypassed application.
Or you can use frida again.
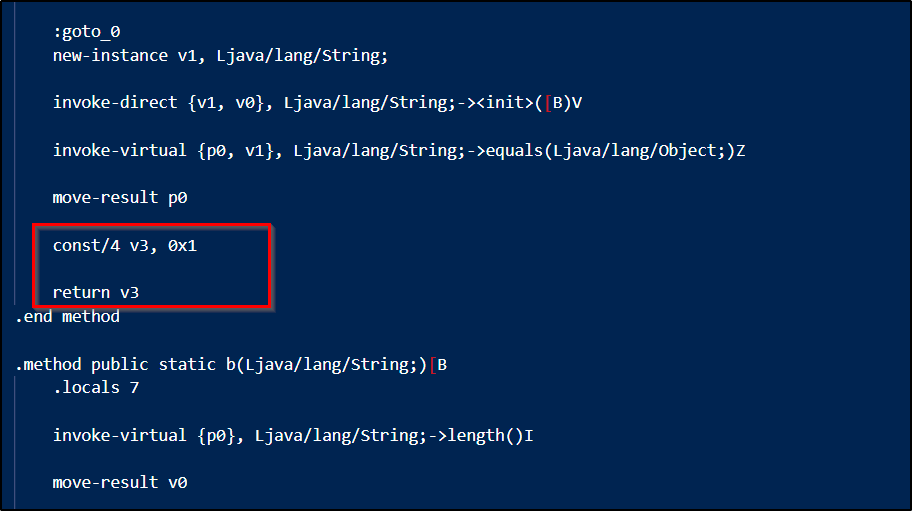
Here we stored a constant value to the register v3. And changed the code to return value of the register.
Now the process of building, signing and optimizing.

We have our complete bypass enabled application ready. So now uninstall the existing one and install the new one.

Lets try it out.
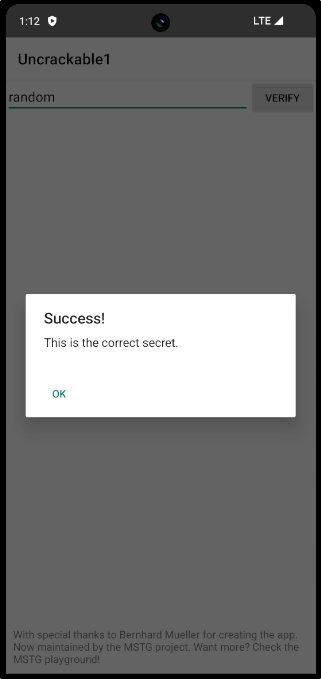
Hurray 🥳... We successfully bypassed the root detection mechanism and string validation mechanism.
I know this ones a bit lengthier. But it covers both static and dynamic analysis of a mobile application. It will be very useful for someone getting into Android penetration testing.
Thank you all...👋